Fetching Data
This page will walk you through how you can fetch data in Server and Client Components, and how to stream components that depend on data.
Fetching data
Server Components
You can fetch data in Server Components using:
- The
fetchAPI - An ORM or database
With the fetch API
To fetch data with the fetch API, turn your component into an asynchronous function, and await the fetch call. For example:
export default async function Page() {
  const data = await fetch('https://api.vercel.app/blog')
  const posts = await data.json()
  return (
    <ul>
      {posts.map((post) => (
        <li key={post.id}>{post.title}</li>
      ))}
    </ul>
  )
}
Good to know:
fetchresponses are not cached by default. However, Next.js will prerender the route and the output will be cached for improved performance. If you'd like to opt into dynamic rendering, use the{ cache: 'no-store' }option. See thefetchAPI Reference.- During development, you can log
fetchcalls for better visibility and debugging. See theloggingAPI reference.
With an ORM or database
Since Server Components are rendered on the server, you can safely make database queries using an ORM or database client. Turn your component into an asynchronous function, and await the call:
import { db, posts } from '@/lib/db'

export default async function Page() {
  const allPosts = await db.select().from(posts)
  return (
    <ul>
      {allPosts.map((post) => (
        <li key={post.id}>{post.title}</li>
      ))}
    </ul>
  )
}
Client Components
There are two ways to fetch data in Client Components, using:
- React's
usehook - A community library like SWR or React Query
Streaming data with the use hook
You can use React's use hook to stream data from the server to client. Start by fetching data in your Server component, and pass the promise to your Client Component as prop:
import Posts from '@/app/ui/posts'
import { Suspense } from 'react'

export default function Page() {
  // Don't await the data fetching function
  const posts = getPosts()

  return (
    <Suspense fallback={<div>Loading...</div>}>
      <Posts posts={posts} />
    </Suspense>
  )
}
Then, in your Client Component, use the use hook to read the promise:
'use client'
import { use } from 'react'

export default function Posts({
  posts,
}: {
  posts: Promise<{ id: string; title: string }[]>
}) {
  const allPosts = use(posts)

  return (
    <ul>
      {allPosts.map((post) => (
        <li key={post.id}>{post.title}</li>
      ))}
    </ul>
  )
}
In the example above, the <Posts> component is wrapped in a <Suspense> boundary. This means the fallback will be shown while the promise is being resolved. Learn more about streaming.
Community libraries
You can use a community library like SWR or React Query to fetch data in Client Components. These libraries have their own semantics for caching, streaming, and other features. For example, with SWR:
'use client'
import useSWR from 'swr'

const fetcher = (url) => fetch(url).then((r) => r.json())

export default function BlogPage() {
  const { data, error, isLoading } = useSWR(
    'https://api.vercel.app/blog',
    fetcher
  )

  if (isLoading) return <div>Loading...</div>
  if (error) return <div>Error: {error.message}</div>

  return (
    <ul>
      {data.map((post: { id: string; title: string }) => (
        <li key={post.id}>{post.title}</li>
      ))}
    </ul>
  )
}
Deduplicate requests and cache data
One way to deduplicate fetch requests is with request memoization. With this mechanism, fetch calls using GET or HEAD with the same URL and options in a single render pass are combined into one request. This happens automatically, and you can opt out by passing an Abort signal to fetch.
Request memoization is scoped to the lifetime of a request.
You can also deduplicate fetch requests by using Next.js’ Data Cache, for example by setting cache: 'force-cache' in your fetch options.
Data Cache allows sharing data across the current render pass and incoming requests.
If you are not using fetch, and instead using an ORM or database directly, you can wrap your data access with the React cache function.
import { cache } from 'react'
import { db, posts, eq } from '@/lib/db'

export const getPost = cache(async (id: string) => {
  const post = await db.query.posts.findFirst({
    where: eq(posts.id, parseInt(id)),
  })
})
Streaming
Warning: The content below assumes the
cacheComponentsconfig option is enabled in your application. The flag was introduced in Next.js 15 canary.
When using async/await in Server Components, Next.js will opt into dynamic rendering. This means the data will be fetched and rendered on the server for every user request. If there are any slow data requests, the whole route will be blocked from rendering.
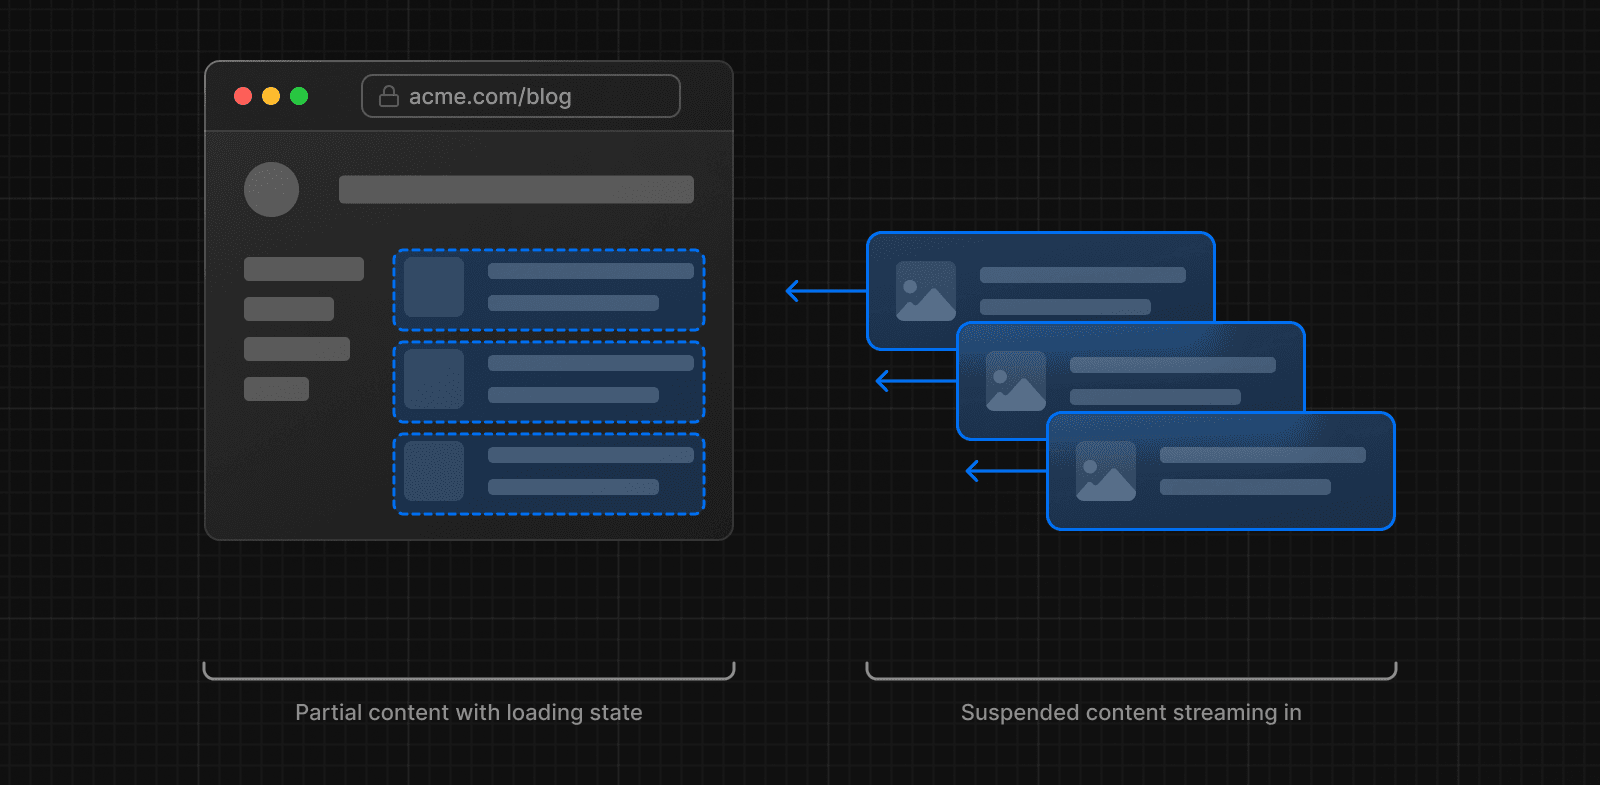
To improve the initial load time and user experience, you can use streaming to break up the page's HTML into smaller chunks and progressively send those chunks from the server to the client.
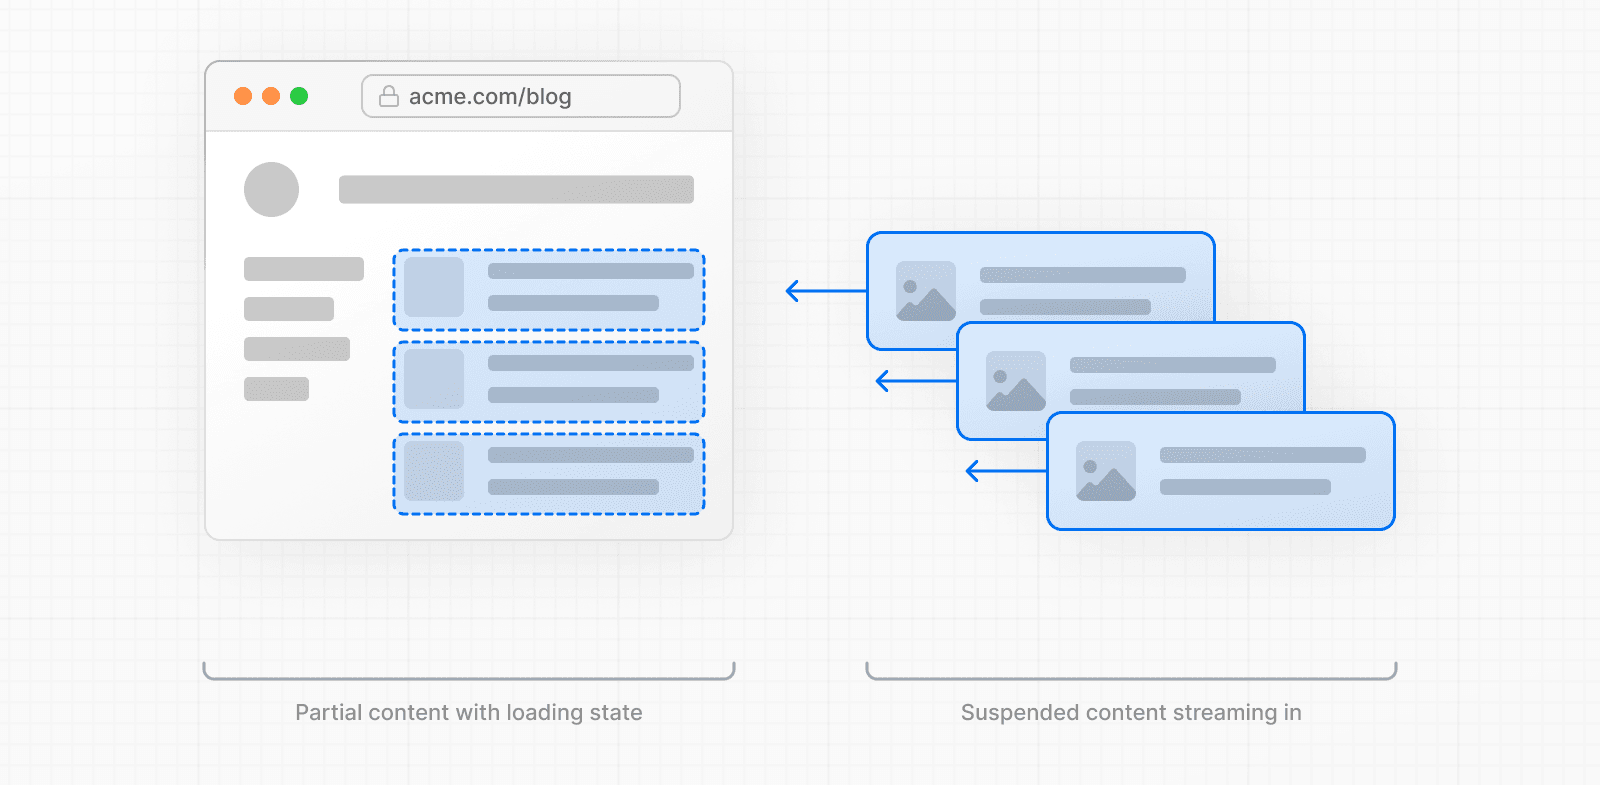
There are two ways you can implement streaming in your application:
- Wrapping a page with a
loading.jsfile - Wrapping a component with
<Suspense>
With loading.js
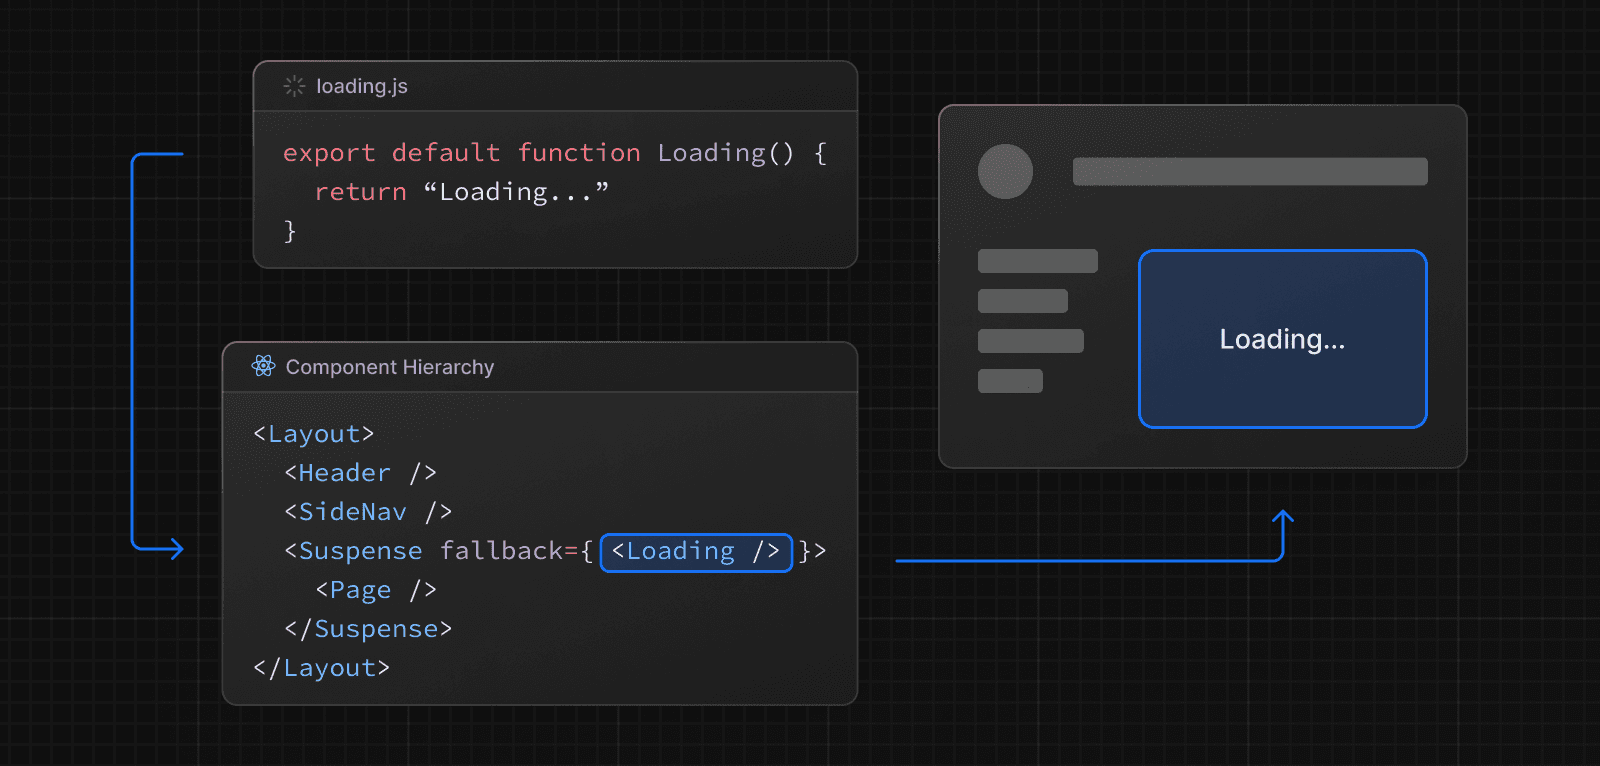
You can create a loading.js file in the same folder as your page to stream the entire page while the data is being fetched. For example, to stream app/blog/page.js, add the file inside the app/blog folder.

export default function Loading() {
  // Define the Loading UI here
  return <div>Loading...</div>
}
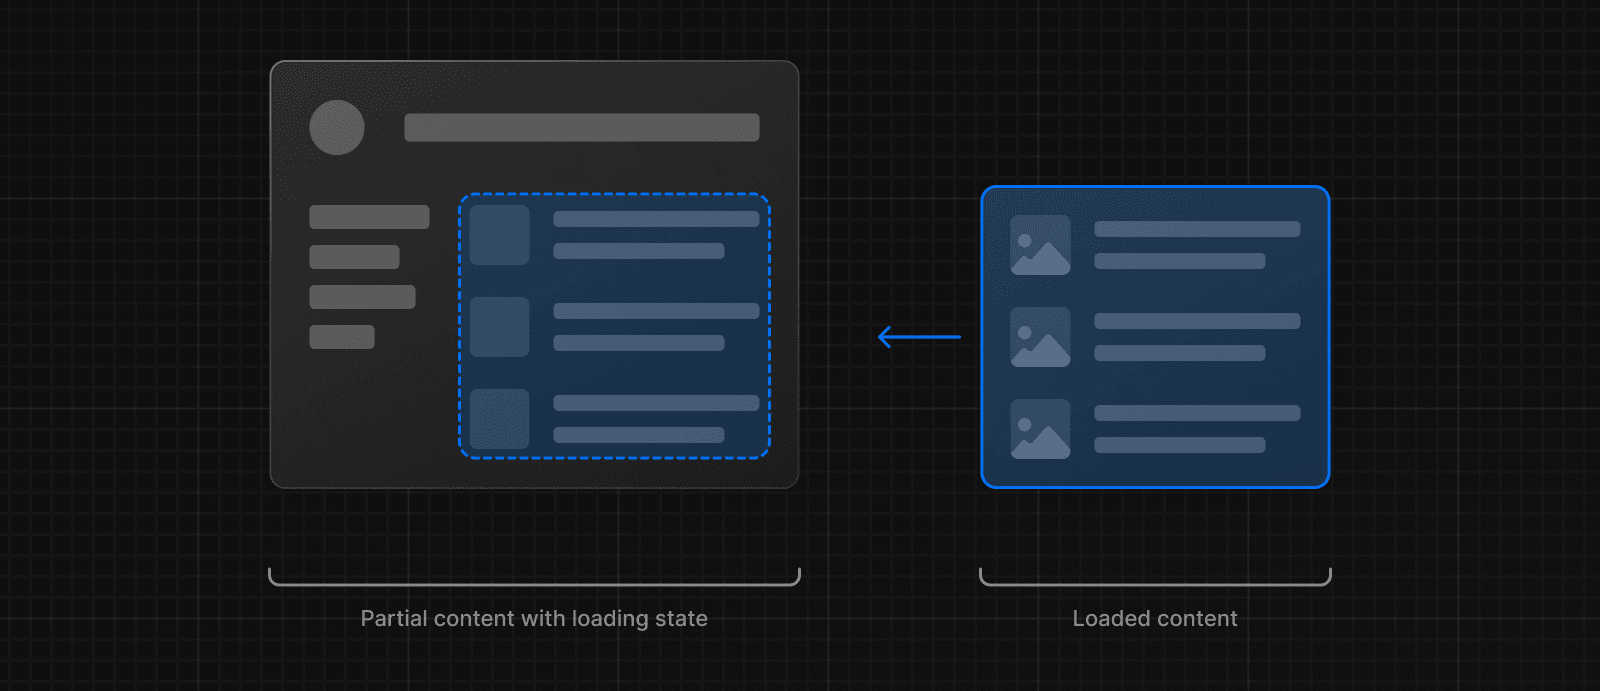
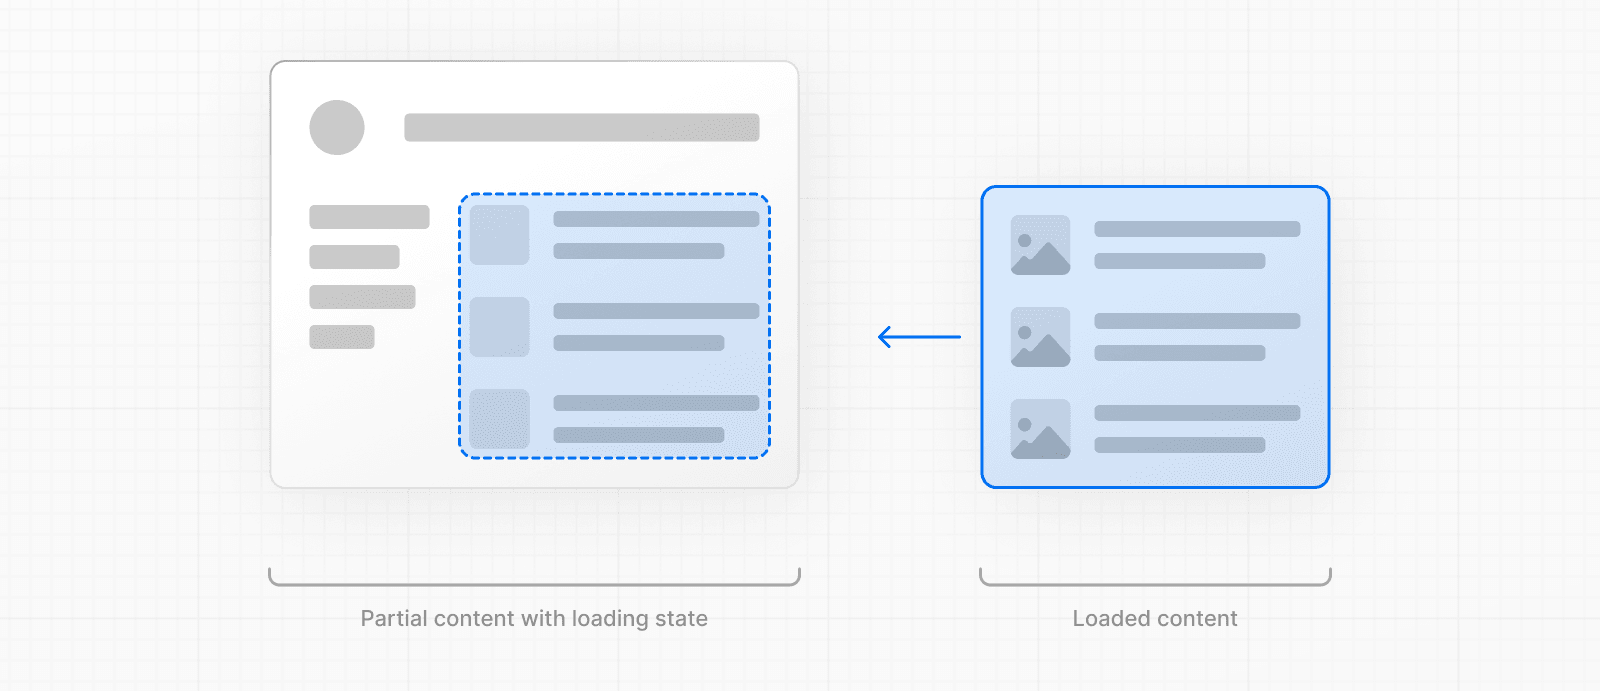
On navigation, the user will immediately see the layout and a loading state while the page is being rendered. The new content will then be automatically swapped in once rendering is complete.
Behind-the-scenes, loading.js will be nested inside layout.js, and will automatically wrap the page.js file and any children below in a <Suspense> boundary.
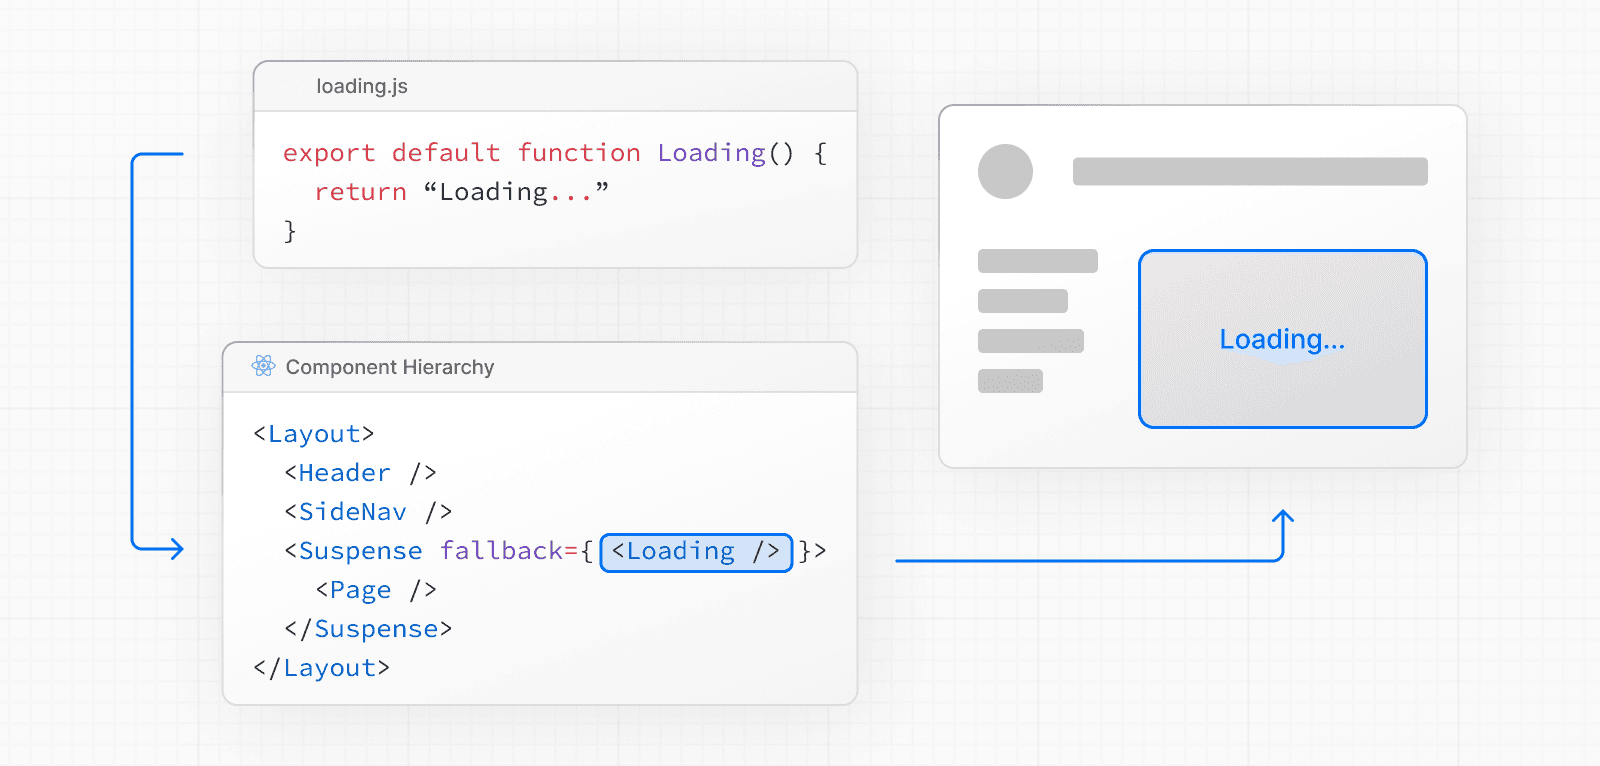
This approach works well for route segments (layouts and pages), but for more granular streaming, you can use <Suspense>.
With <Suspense>
<Suspense> allows you to be more granular about what parts of the page to stream. For example, you can immediately show any page content that falls outside of the <Suspense> boundary, and stream in the list of blog posts inside the boundary.
import { Suspense } from 'react'
import BlogList from '@/components/BlogList'
import BlogListSkeleton from '@/components/BlogListSkeleton'

export default function BlogPage() {
  return (
    <div>
      {/* This content will be sent to the client immediately */}
      <header>
        <h1>Welcome to the Blog</h1>
        <p>Read the latest posts below.</p>
      </header>
      <main>
        {/* Any content wrapped in a <Suspense> boundary will be streamed */}
        <Suspense fallback={<BlogListSkeleton />}>
          <BlogList />
        </Suspense>
      </main>
    </div>
  )
}
Creating meaningful loading states
An instant loading state is fallback UI that is shown immediately to the user after navigation. For the best user experience, we recommend designing loading states that are meaningful and help users understand the app is responding. For example, you can use skeletons and spinners, or a small but meaningful part of future screens such as a cover photo, title, etc.
In development, you can preview and inspect the loading state of your components using the React Devtools.
Examples
Sequential data fetching
Sequential data fetching happens when nested components in a tree each fetch their own data and the requests are not deduplicated, leading to longer response times.

There may be cases where you want this pattern because one fetch depends on the result of the other.
For example, the <Playlists> component will only start fetching data once the <Artist> component has finished fetching data because <Playlists> depends on the artistID prop:
export default async function Page({
  params,
}: {
  params: Promise<{ username: string }>
}) {
  const { username } = await params
  // Get artist information
  const artist = await getArtist(username)

  return (
    <>
      <h1>{artist.name}</h1>
      {/* Show fallback UI while the Playlists component is loading */}
      <Suspense fallback={<div>Loading...</div>}>
        {/* Pass the artist ID to the Playlists component */}
        <Playlists artistID={artist.id} />
      </Suspense>
    </>
  )
}

async function Playlists({ artistID }: { artistID: string }) {
  // Use the artist ID to fetch playlists
  const playlists = await getArtistPlaylists(artistID)

  return (
    <ul>
      {playlists.map((playlist) => (
        <li key={playlist.id}>{playlist.name}</li>
      ))}
    </ul>
  )
}
To improve the user experience, you should use React <Suspense> to show a fallback while data is being fetch. This will enable streaming and prevent the whole route from being blocked by the sequential data requests.
Parallel data fetching
Parallel data fetching happens when data requests in a route are eagerly initiated and start at the same time.
By default, layouts and pages are rendered in parallel. So each segment starts fetching data as soon as possible.
However, within any component, multiple async/await requests can still be sequential if placed after the other. For example, getAlbums will be blocked until getArtist is resolved:
import { getArtist, getAlbums } from '@/app/lib/data'

export default async function Page({ params }) {
  // These requests will be sequential
  const { username } = await params
  const artist = await getArtist(username)
  const albums = await getAlbums(username)
  return <div>{artist.name}</div>
}
Start multiple requests by calling fetch, then await them with Promise.all. Requests begin as soon as fetch is called.
import Albums from './albums'

async function getArtist(username: string) {
  const res = await fetch(`https://api.example.com/artist/${username}`)
  return res.json()
}

async function getAlbums(username: string) {
  const res = await fetch(`https://api.example.com/artist/${username}/albums`)
  return res.json()
}

export default async function Page({
  params,
}: {
  params: Promise<{ username: string }>
}) {
  const { username } = await params

  // Initiate requests
  const artistData = getArtist(username)
  const albumsData = getAlbums(username)

  const [artist, albums] = await Promise.all([artistData, albumsData])

  return (
    <>
      <h1>{artist.name}</h1>
      <Albums list={albums} />
    </>
  )
}
Good to know: If one request fails when using
Promise.all, the entire operation will fail. To handle this, you can use thePromise.allSettledmethod instead.
Preloading data
You can preload data by creating an utility function that you eagerly call above blocking requests. <Item> conditionally renders based on the checkIsAvailable() function.
You can call preload() before checkIsAvailable() to eagerly initiate <Item/> data dependencies. By the time <Item/> is rendered, its data has already been fetched.
import { getItem, checkIsAvailable } from '@/lib/data'

export default async function Page({
  params,
}: {
  params: Promise<{ id: string }>
}) {
  const { id } = await params
  // starting loading item data
  preload(id)
  // perform another asynchronous task
  const isAvailable = await checkIsAvailable()

  return isAvailable ? <Item id={id} /> : null
}

export const preload = (id: string) => {
  // void evaluates the given expression and returns undefined
  // https://developer.mozilla.org/docs/Web/JavaScript/Reference/Operators/void
  void getItem(id)
}
export async function Item({ id }: { id: string }) {
  const result = await getItem(id)
  // ...
}
Additionally, you can use React's cache function and the server-only package to create a reusable utility function. This approach allows you to cache the data fetching function and ensure that it's only executed on the server.
import { cache } from 'react'
import 'server-only'
import { getItem } from '@/lib/data'

export const preload = (id: string) => {
  void getItem(id)
}

export const getItem = cache(async (id: string) => {
  // ...
})
API Reference
Data Security
fetch
loading.js
logging
taint
Was this helpful?
