loading.js
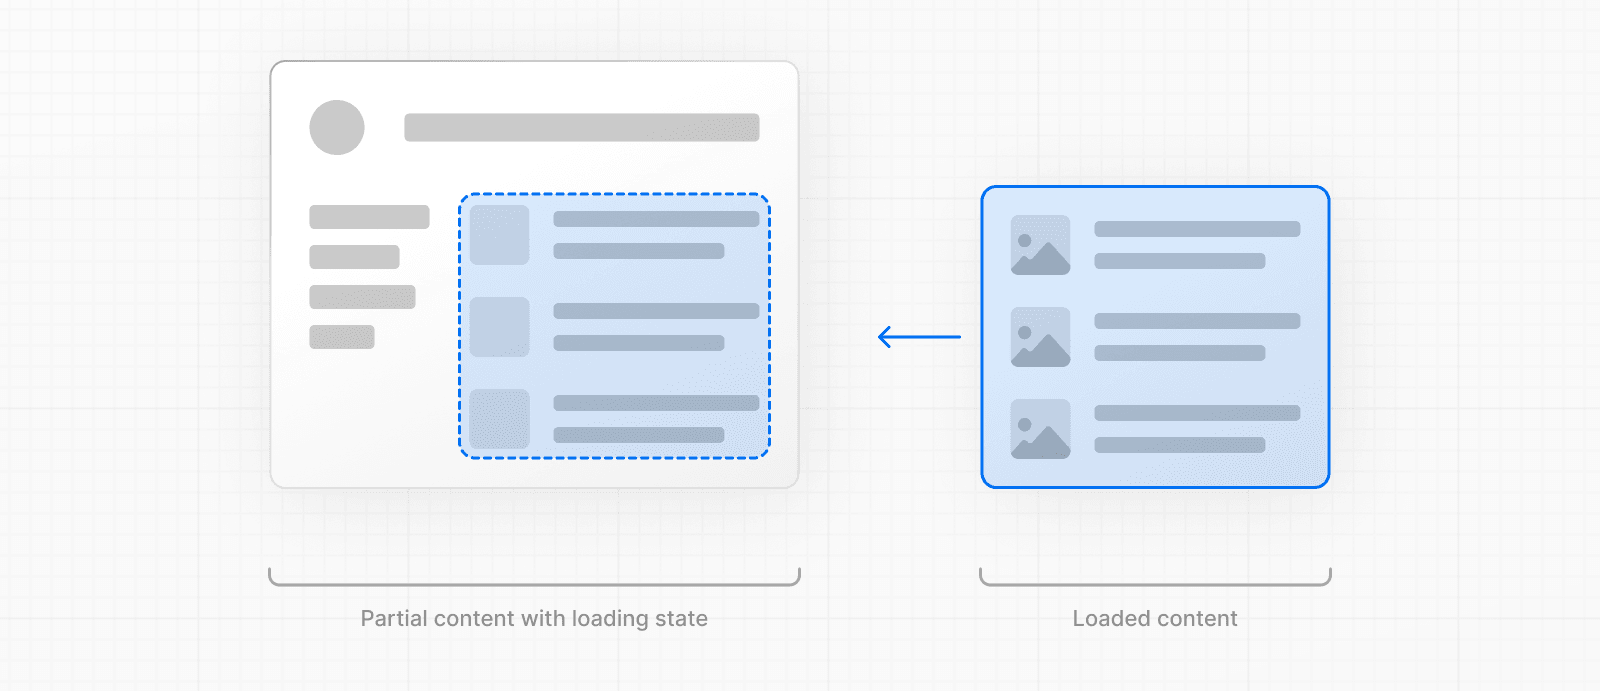
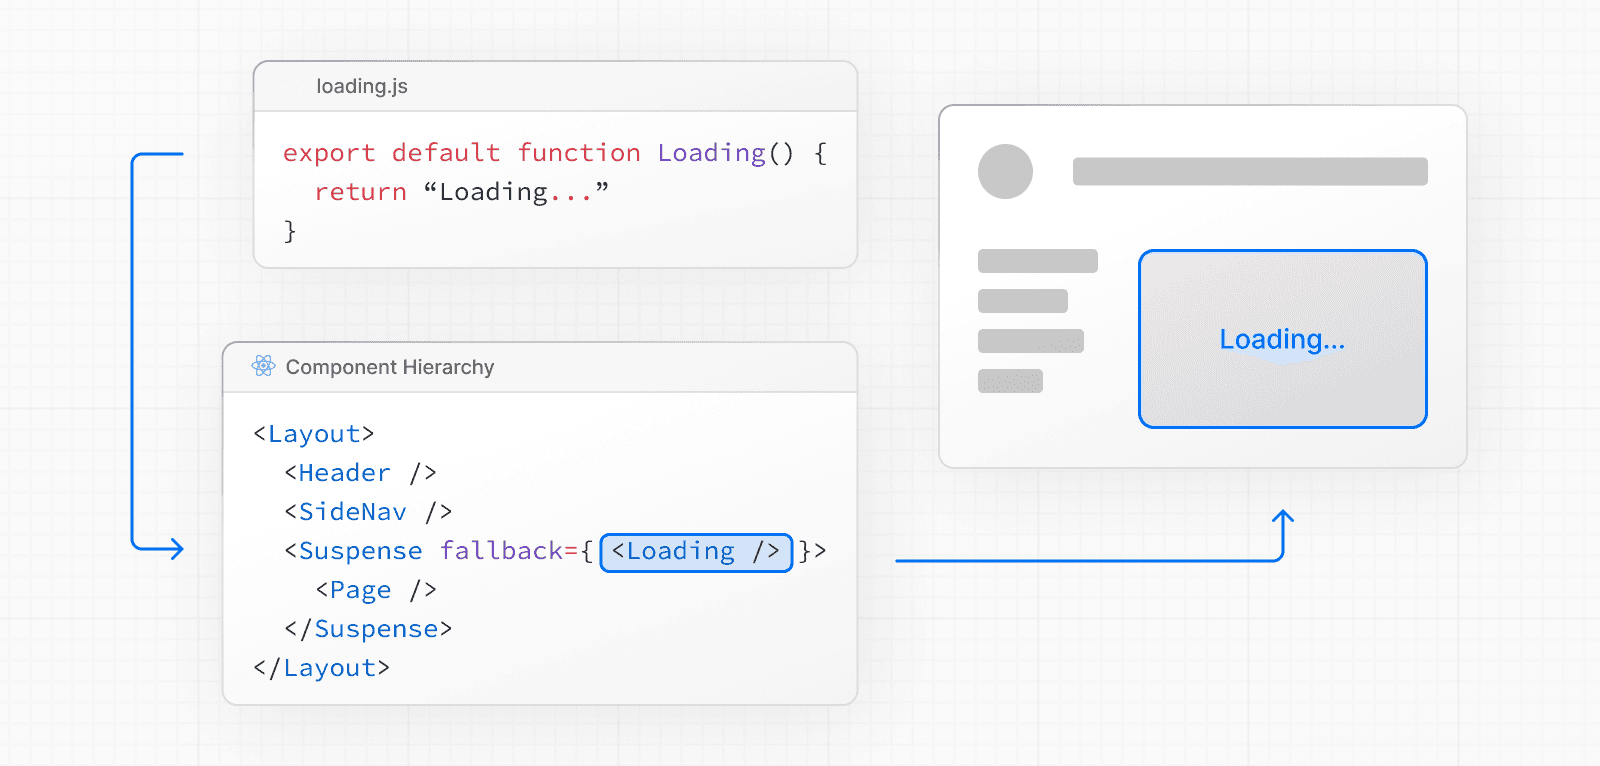
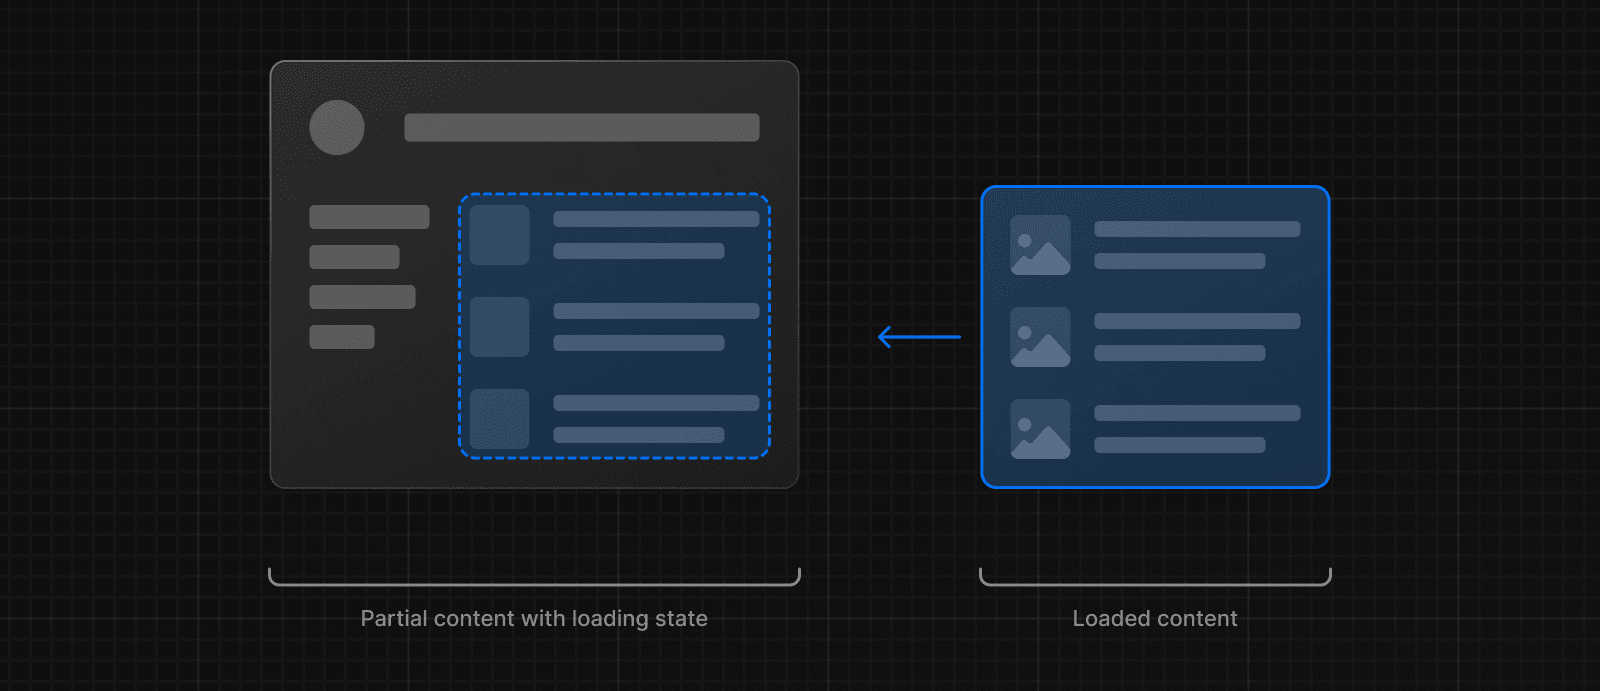
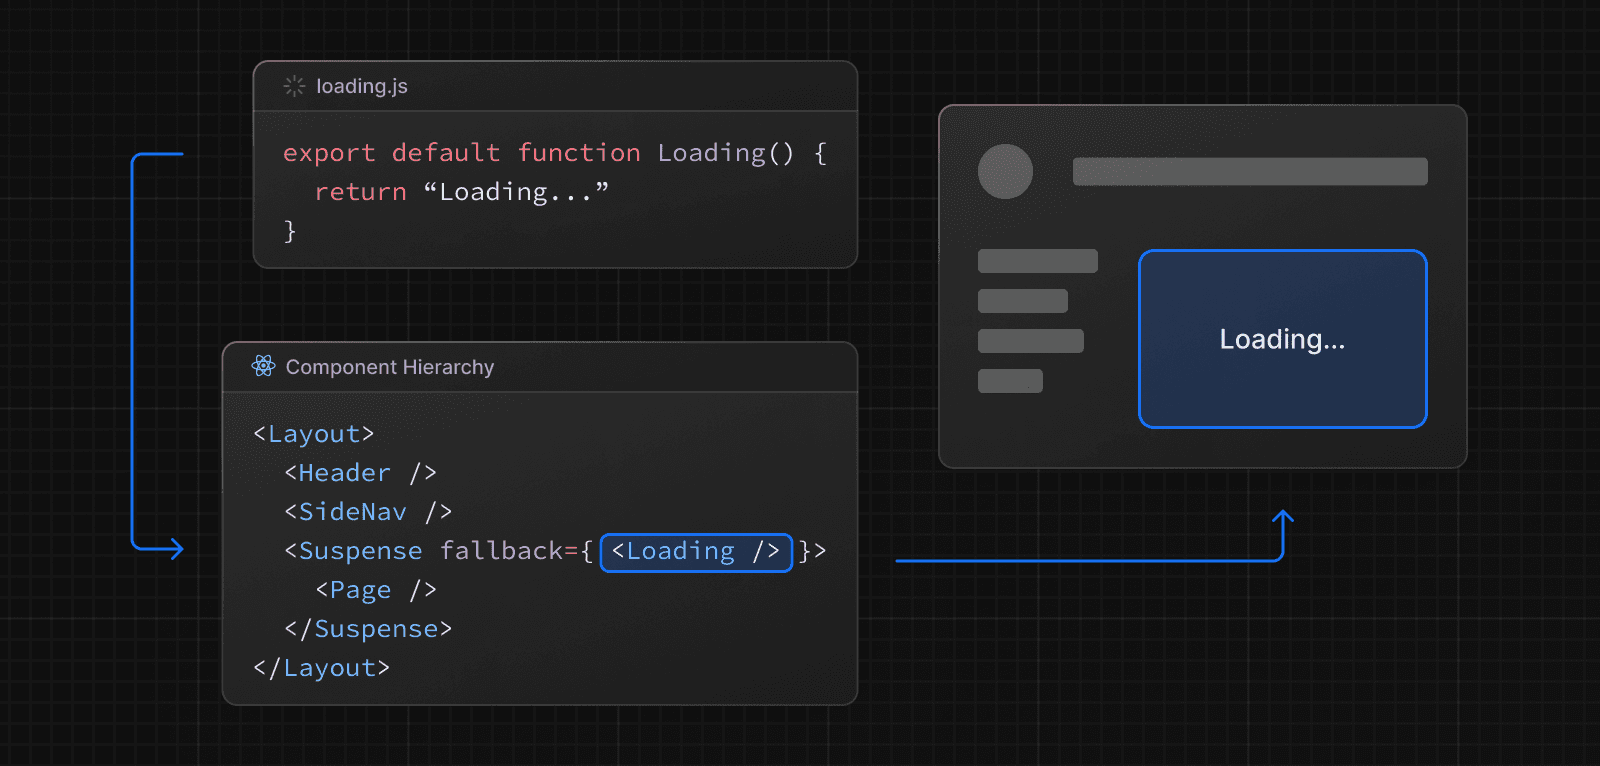
The special file loading.js helps you create meaningful Loading UI with React Suspense. With this convention, you can show an instant loading state from the server while the content of a route segment streams in. The new content is automatically swapped in once complete.

export default function Loading() {
  // Or a custom loading skeleton component
  return <p>Loading...</p>
}
Inside the loading.js file, you can add any light-weight loading UI. You may find it helpful to use the React Developer Tools to manually toggle Suspense boundaries.
By default, this file is a Server Component - but can also be used as a Client Component through the "use client" directive.
Reference
Parameters
Loading UI components do not accept any parameters.
Behavior
Navigation
- The Fallback UI is prefetched, making navigation immediate unless prefetching hasn't completed.
- Navigation is interruptible, meaning changing routes does not need to wait for the content of the route to fully load before navigating to another route.
- Shared layouts remain interactive while new route segments load.
Instant Loading States
An instant loading state is fallback UI that is shown immediately upon navigation. You can pre-render loading indicators such as skeletons and spinners, or a small but meaningful part of future screens such as a cover photo, title, etc. This helps users understand the app is responding and provides a better user experience.
Create a loading state by adding a loading.js file inside a folder.

export default function Loading() {
  // You can add any UI inside Loading, including a Skeleton.
  return <LoadingSkeleton />
}
In the same folder, loading.js will be nested inside layout.js. It will automatically wrap the page.js file and any children below in a <Suspense> boundary.

SEO
- For bots that only scrape static HTML, and cannot execute JavaScript like a full browser, such as Twitterbot, Next.js resolves
generateMetadatabefore streaming UI, and metadata is placed in the<head>of the initial HTML. - Otherwise, streaming metadata may be used. Next.js automatically detects user agents to choose between blocking and streaming behavior.
- Since streaming is server-rendered, it does not impact SEO. You can use the Rich Results Test tool from Google to see how your page appears to Google's web crawlers and view the serialized HTML (source).
Status Codes
When streaming, a 200 status code will be returned to signal that the request was successful.
The server can still communicate errors or issues to the client within the streamed content itself, for example, when using redirect or notFound. Because the response headers have already been sent to the client, the status code of the response cannot be updated.
For example, when a 404 page is streamed to the client, Next.js includes a <meta name="robots" content="noindex"> tag in the streamed HTML. This prevents search engines from indexing that URL even if the HTTP status is 200. See Google’s guidance on the robots meta tag.
Some crawlers may label these responses as “soft 404s”. In the streaming case, this does not lead to indexation because the page is explicitly marked noindex in the HTML.
If you need a 404 status, for compliance or analytics, ensure the resource exists before the response body is streamed, so that the server can set the HTTP status code.
You can run this check in proxy to rewrite missing slugs to a not-found route, or produce a 404 response. Keep proxy checks fast, and avoid fetching full content there.
When is the response body streamed?
The response body starts streaming when a Suspense fallback renders (for example, a loading.tsx) or when a Server Component suspends under a Suspense boundary. Place notFound() before those boundaries and before any await that may suspend.
To start streaming, the response headers must be set. This is why it is not possible to change the status code after streaming started.
Browser limits
Some browsers buffer a streaming response. You may not see the streamed response until the response exceeds 1024 bytes. This typically only affects “hello world” applications, but not real applications.
Platform Support
| Deployment Option | Supported |
|---|---|
| Node.js server | Yes |
| Docker container | Yes |
| Static export | No |
| Adapters | Platform-specific |
Learn how to configure streaming when self-hosting Next.js.
Examples
Streaming with Suspense
In addition to loading.js, you can also manually create Suspense Boundaries for your own UI components. The App Router supports streaming with Suspense.
<Suspense> works by wrapping a component that performs an asynchronous action (e.g. fetch data), showing fallback UI (e.g. skeleton, spinner) while it's happening, and then swapping in your component once the action completes.
import { Suspense } from 'react'
import { PostFeed, Weather } from './Components'

export default function Posts() {
  return (
    <section>
      <Suspense fallback={<p>Loading feed...</p>}>
        <PostFeed />
      </Suspense>
      <Suspense fallback={<p>Loading weather...</p>}>
        <Weather />
      </Suspense>
    </section>
  )
}
By using Suspense, you get the benefits of:
- Streaming Server Rendering - Progressively rendering HTML from the server to the client.
- Selective Hydration - React prioritizes what components to make interactive first based on user interaction.
For more Suspense examples and use cases, please see the React Documentation.
Version History
| Version | Changes |
|---|---|
v13.0.0 | loading introduced. |
Was this helpful?


