3
Chapter 3
Updating UI with Javascript
In this chapter, we'll start building out our project by using JavaScript and DOM methods to add an h1 tag to your project.
Open your code editor and create a new index.html file. Inside the HTML file, add the following code:
<html>
  <body>
    <div></div>
  </body>
</html>
Then give the div a unique id so that you can target it later.
<html>
  <body>
    <div id="app"></div>
  </body>
</html>
To write JavaScript inside your HTML file, add a script tag:
<html>
  <body>
    <div id="app"></div>
    <script type="text/javascript"></script>
  </body>
</html>
Now, inside the script tag, you can use a DOM method, getElementById(), to select the <div> element by its id:
<html>
  <body>
    <div id="app"></div>
    <script type="text/javascript">
      const app = document.getElementById('app');
    </script>
  </body>
</html>
You can continue using DOM methods to create a new <h1> element:
<html>
  <body>
    <div id="app"></div>
    <script type="text/javascript">
      // Select the div element with 'app' id
      const app = document.getElementById('app');

      // Create a new H1 element
      const header = document.createElement('h1');

      // Create a new text node for the H1 element
      const text = 'Develop. Preview. Ship.';
      const headerContent = document.createTextNode(text);

      // Append the text to the H1 element
      header.appendChild(headerContent);

      // Place the H1 element inside the div
      app.appendChild(header);
    </script>
  </body>
</html>
To make sure everything is working, open your HTML file inside your browser of choice. You should see an h1 tag that says, 'Develop. Preview. Ship.'.
HTML vs. the DOM
If you look at the DOM elements inside your browser developer tools, you will notice the DOM includes the <h1> element. The DOM of the page is different from the source code - or in other words, the original HTML file you created.
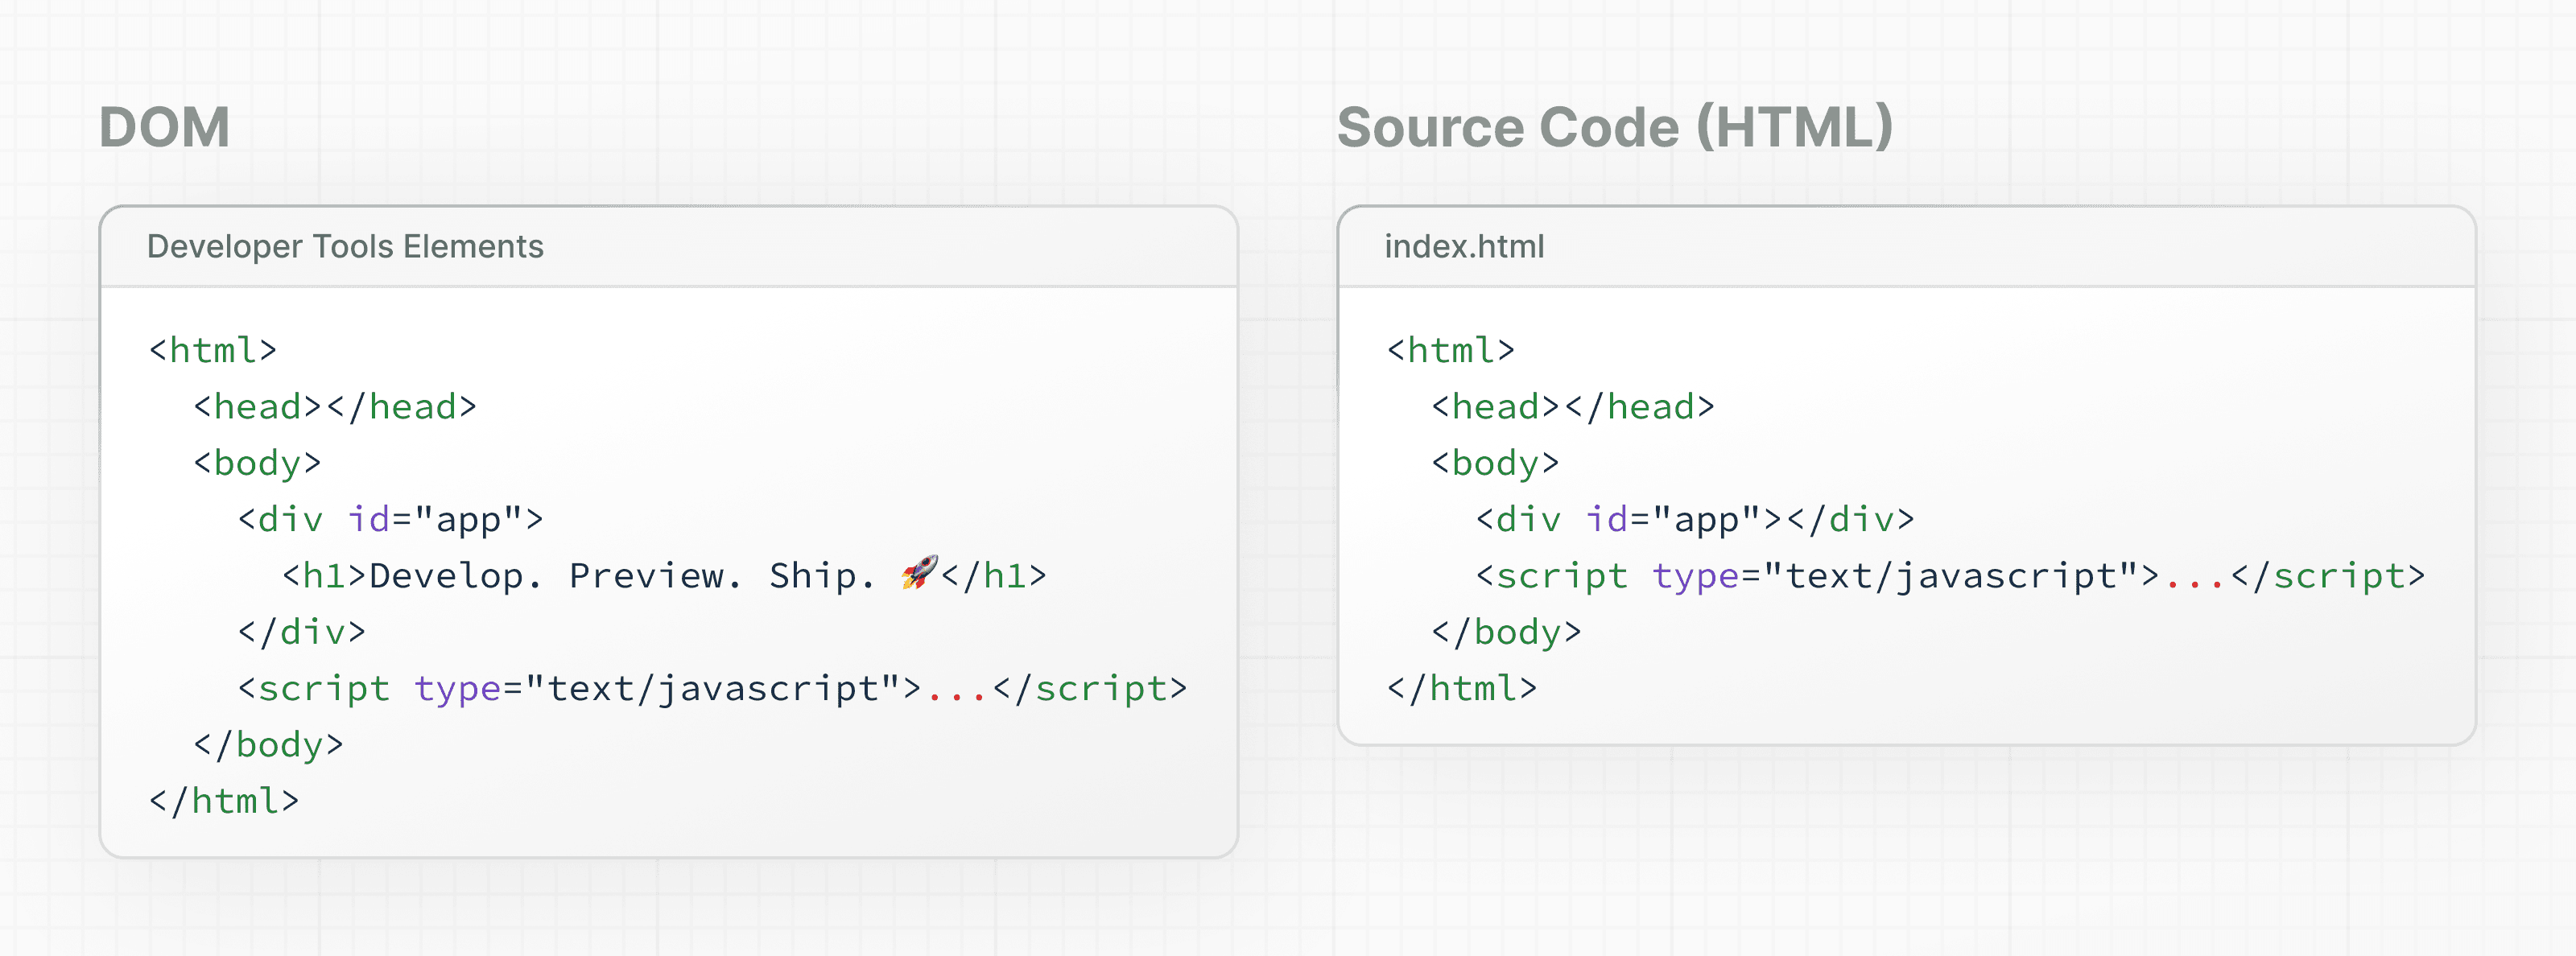

This is because the HTML represents the initial page content, whereas the DOM represents the updated page content which was changed by the JavaScript code you wrote.
Updating the DOM with plain JavaScript is very powerful but verbose. You've written all this code to add an <h1> element with some text:
<script type="text/javascript">
  const app = document.getElementById('app');
  const header = document.createElement('h1');
  const text = 'Develop. Preview. Ship.';
  const headerContent = document.createTextNode(text);
  header.appendChild(headerContent);
  app.appendChild(header);
</script>
As the size of an app or team grows, it can become increasingly challenging to build applications this way.
With this approach, developers spend a lot of time writing instructions to tell the computer how it should do things. But wouldn't it be nice to describe what you want to show and let the computer figure out how to update the DOM?
Imperative vs. declarative programming
The code above is a good example of imperative programming. You're writing the steps for how the user interface should be updated. But when it comes to building user interfaces, a declarative approach is often preferred because it can speed up the development process. Instead of having to write DOM methods, it would be helpful if developers were able to declare what they want to show (in this case, an h1 tag with some text).
In other words, imperative programming is like giving a chef step-by-step instructions on how to make a pizza. Declarative programming is like ordering a pizza without being concerned about the steps it takes to make the pizza. 🍕
React is a popular declarative library that you can use build user interfaces.
React: A declarative UI library
As a developer, you can tell React what you want to happen to the user interface, and React will figure out the steps of how to update the DOM on your behalf.
In the next section, we'll explore how you can get started with React.
Additional Resources:
You've Completed Chapter 3
You've learned how developers use JavaScript to update the UI.
Was this helpful?