2
Chapter 2
CSS Styling
Currently, your home page doesn't have any styles. Let's look at the different ways you can style your Next.js application.
In this chapter...
Here are the topics we’ll cover
How to add a global CSS file to your application.
Two different ways of styling: Tailwind and CSS modules.
How to conditionally add class names with the clsx utility package.
Global styles
If you look inside the /app/ui folder, you'll see a file called global.css. You can use this file to add CSS rules to all the routes in your application - such as CSS reset rules, site-wide styles for HTML elements like links, and more.
You can import global.css in any component in your application, but it's usually good practice to add it to your top-level component. In Next.js, this is the root layout (more on this later).
Add global styles to your application by navigating to /app/layout.tsx and importing the global.css file:
import '@/app/ui/global.css';

export default function RootLayout({
  children,
}: {
  children: React.ReactNode;
}) {
  return (
    <html lang="en">
      <body>{children}</body>
    </html>
  );
}
With the development server still running, save your changes and preview them in the browser. Your home page should now look like this:
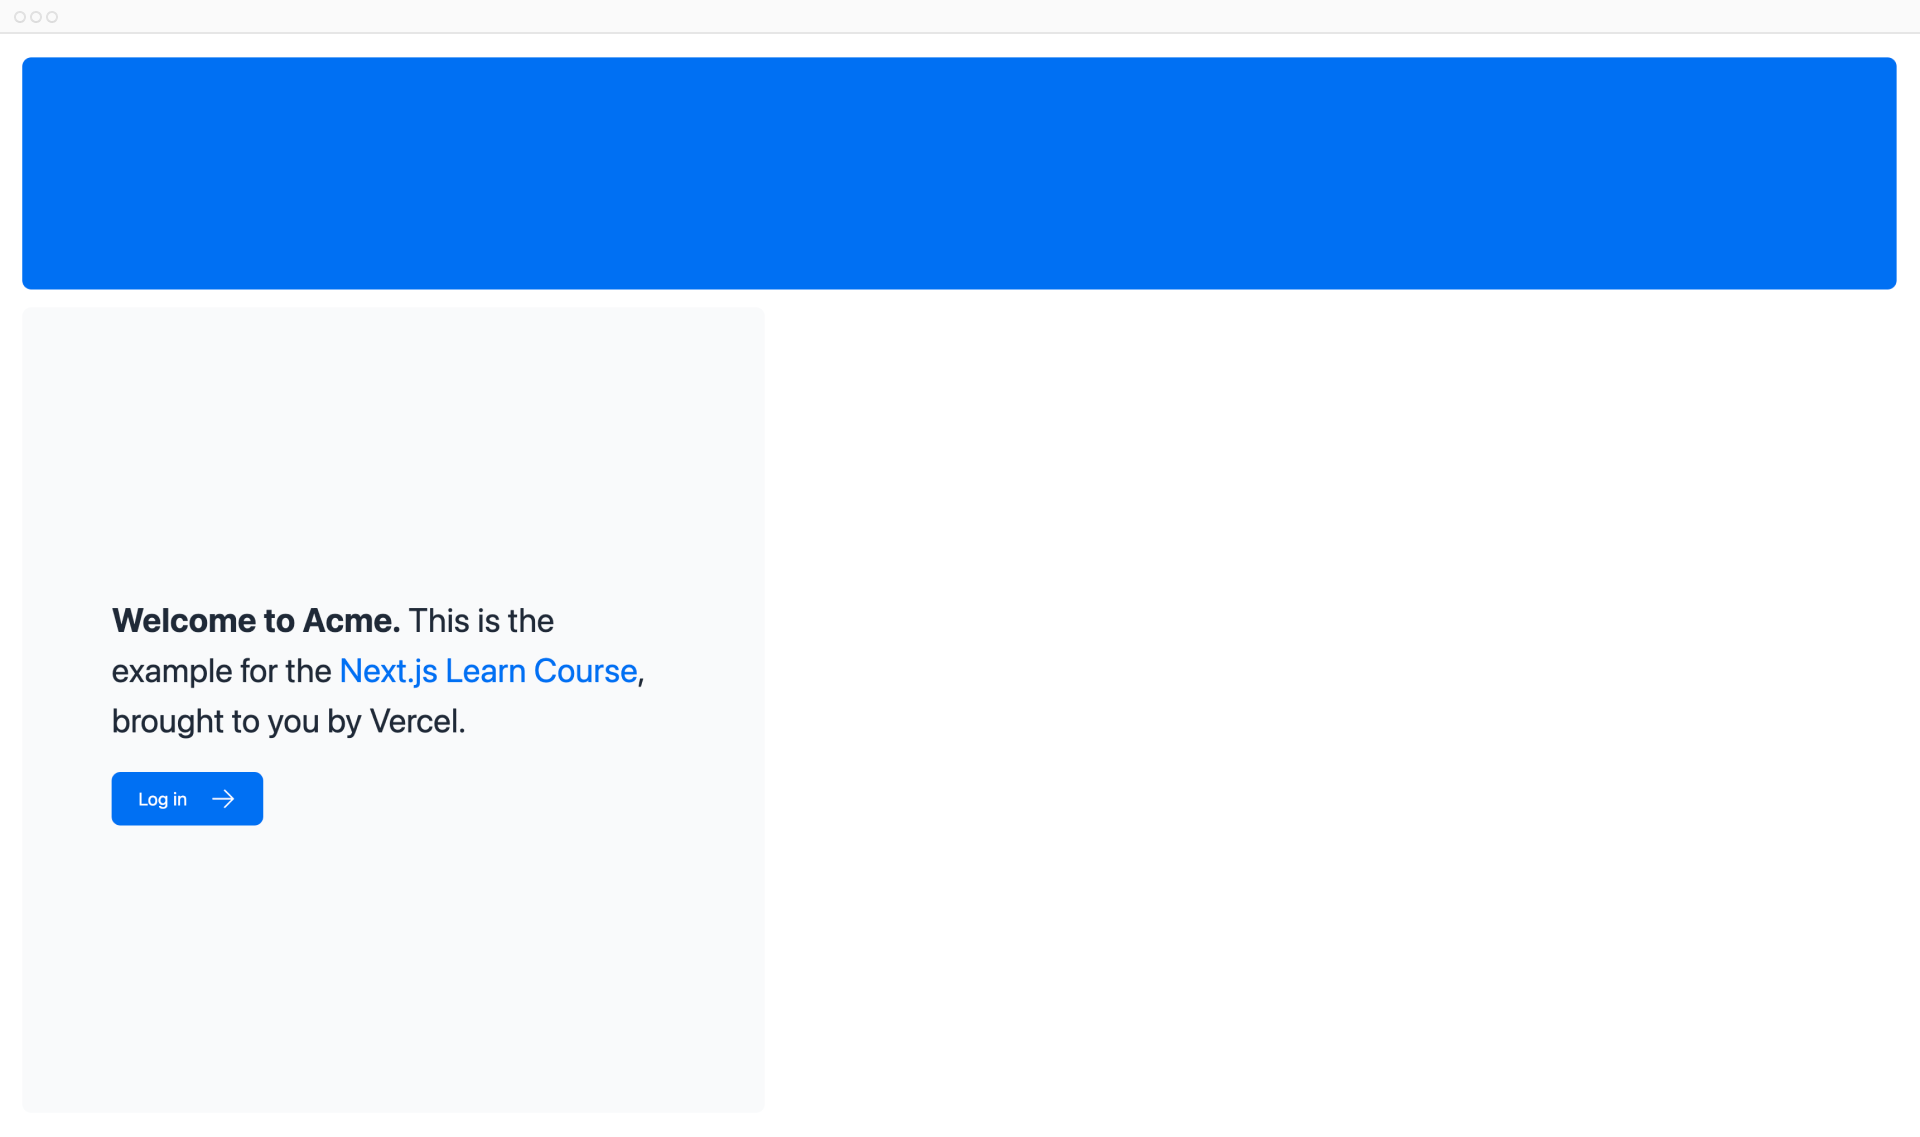

But wait a second, you didn't add any CSS rules, where did the styles come from?
If you take a look inside global.css, you'll notice some @tailwind directives:
@tailwind base;
@tailwind components;
@tailwind utilities;
Tailwind
Tailwind is a CSS framework that speeds up the development process by allowing you to quickly write utility classes directly in your TSX markup.
In Tailwind, you style elements by adding class names. For example, adding the class "text-blue-500" will turn the <h1> text blue:
<h1 className="text-blue-500">I'm blue!</h1>Although the CSS styles are shared globally, each class is singularly applied to each element. This means if you add or delete an element, you don't have to worry about maintaining separate stylesheets, style collisions, or the size of your CSS bundle growing as your application scales.
When you use create-next-app to start a new project, Next.js will ask if you want to use Tailwind. If you select yes, Next.js will automatically install the necessary packages and configure Tailwind in your application.
If you look at /app/page.tsx, you'll see that we're using Tailwind classes in the example.
import AcmeLogo from '@/app/ui/acme-logo';
import { ArrowRightIcon } from '@heroicons/react/24/outline';
import Link from 'next/link';

export default function Page() {
  return (
    // These are Tailwind classes:
    <main className="flex min-h-screen flex-col p-6">
      <div className="flex h-20 shrink-0 items-end rounded-lg bg-blue-500 p-4 md:h-52">
    // ...
  )
}
Don't worry if this is your first time using Tailwind. To save time, we've already styled all the components you'll be using.
Let's play with Tailwind! Copy the code below and paste it above the <p> element in /app/page.tsx:
<div
  className="h-0 w-0 border-b-[30px] border-l-[20px] border-r-[20px] border-b-black border-l-transparent border-r-transparent"
/>
If you prefer writing traditional CSS rules or keeping your styles separate from your JSX - CSS Modules are a great alternative.
CSS Modules
CSS Modules allow you to scope CSS to a component by automatically creating unique class names, so you don't have to worry about style collisions as well.
We'll continue using Tailwind in this course, but let's take a moment to see how you can achieve the same results from the quiz above using CSS modules.
Inside /app/ui, create a new file called home.module.css and add the following CSS rules:
.shape {
  height: 0;
  width: 0;
  border-bottom: 30px solid black;
  border-left: 20px solid transparent;
  border-right: 20px solid transparent;
}
Then, inside your /app/page.tsx file import the styles and replace the Tailwind class names from the <div> you've added with styles.shape:
import styles from '@/app/ui/home.module.css';
<div className={styles.shape} />;
Save your changes and preview them in the browser. You should see the same shape as before.
Tailwind and CSS modules are the two most common ways of styling Next.js applications. Whether you use one or the other is a matter of preference - you can even use both in the same application!
Using the clsx library to toggle class names
There may be cases where you may need to conditionally style an element based on state or some other condition.
clsx is a library that lets you toggle class names easily. We recommend taking a look at documentation for more details, but here's the basic usage:
- Suppose that you want to create an
InvoiceStatuscomponent which acceptsstatus. The status can be'pending'or'paid'. - If it's
'paid', you want the color to be green. If it's'pending', you want the color to be gray.
You can use clsx to conditionally apply the classes, like this:
import clsx from 'clsx';

export default function InvoiceStatus({ status }: { status: string }) {
  return (
    <span
      className={clsx(
        'inline-flex items-center rounded-full px-2 py-1 text-sm',
        {
          'bg-gray-100 text-gray-500': status === 'pending',
          'bg-green-500 text-white': status === 'paid',
        },
      )}
    >
    // ...
)}
Other styling solutions
In addition to the approaches we've discussed, you can also style your Next.js application with:
- Sass which allows you to import
.cssand.scssfiles. - CSS-in-JS libraries such as styled-jsx, styled-components, and emotion.
Take a look at the CSS documentation for more information.
You've Completed Chapter 2
Well done! You've learned about the different ways of styling a Next.js application.
Was this helpful?