9
Chapter 9
Streaming
In the previous chapter, you made your dashboard page dynamic, however, we discussed how the slow data fetches can impact the performance of your application. Let's look at how you can improve the user experience when there are slow data requests.
In this chapter...
Here are the topics we’ll cover
What streaming is and when you might use it.
How to implement streaming with loading.tsx and Suspense.
What loading skeletons are.
What route groups are, and when you might use them.
Where to place Suspense boundaries in your application.
What is streaming?
Streaming is a data transfer technique that allows you to break down a route into smaller "chunks" and progressively stream them from the server to the client as they become ready.
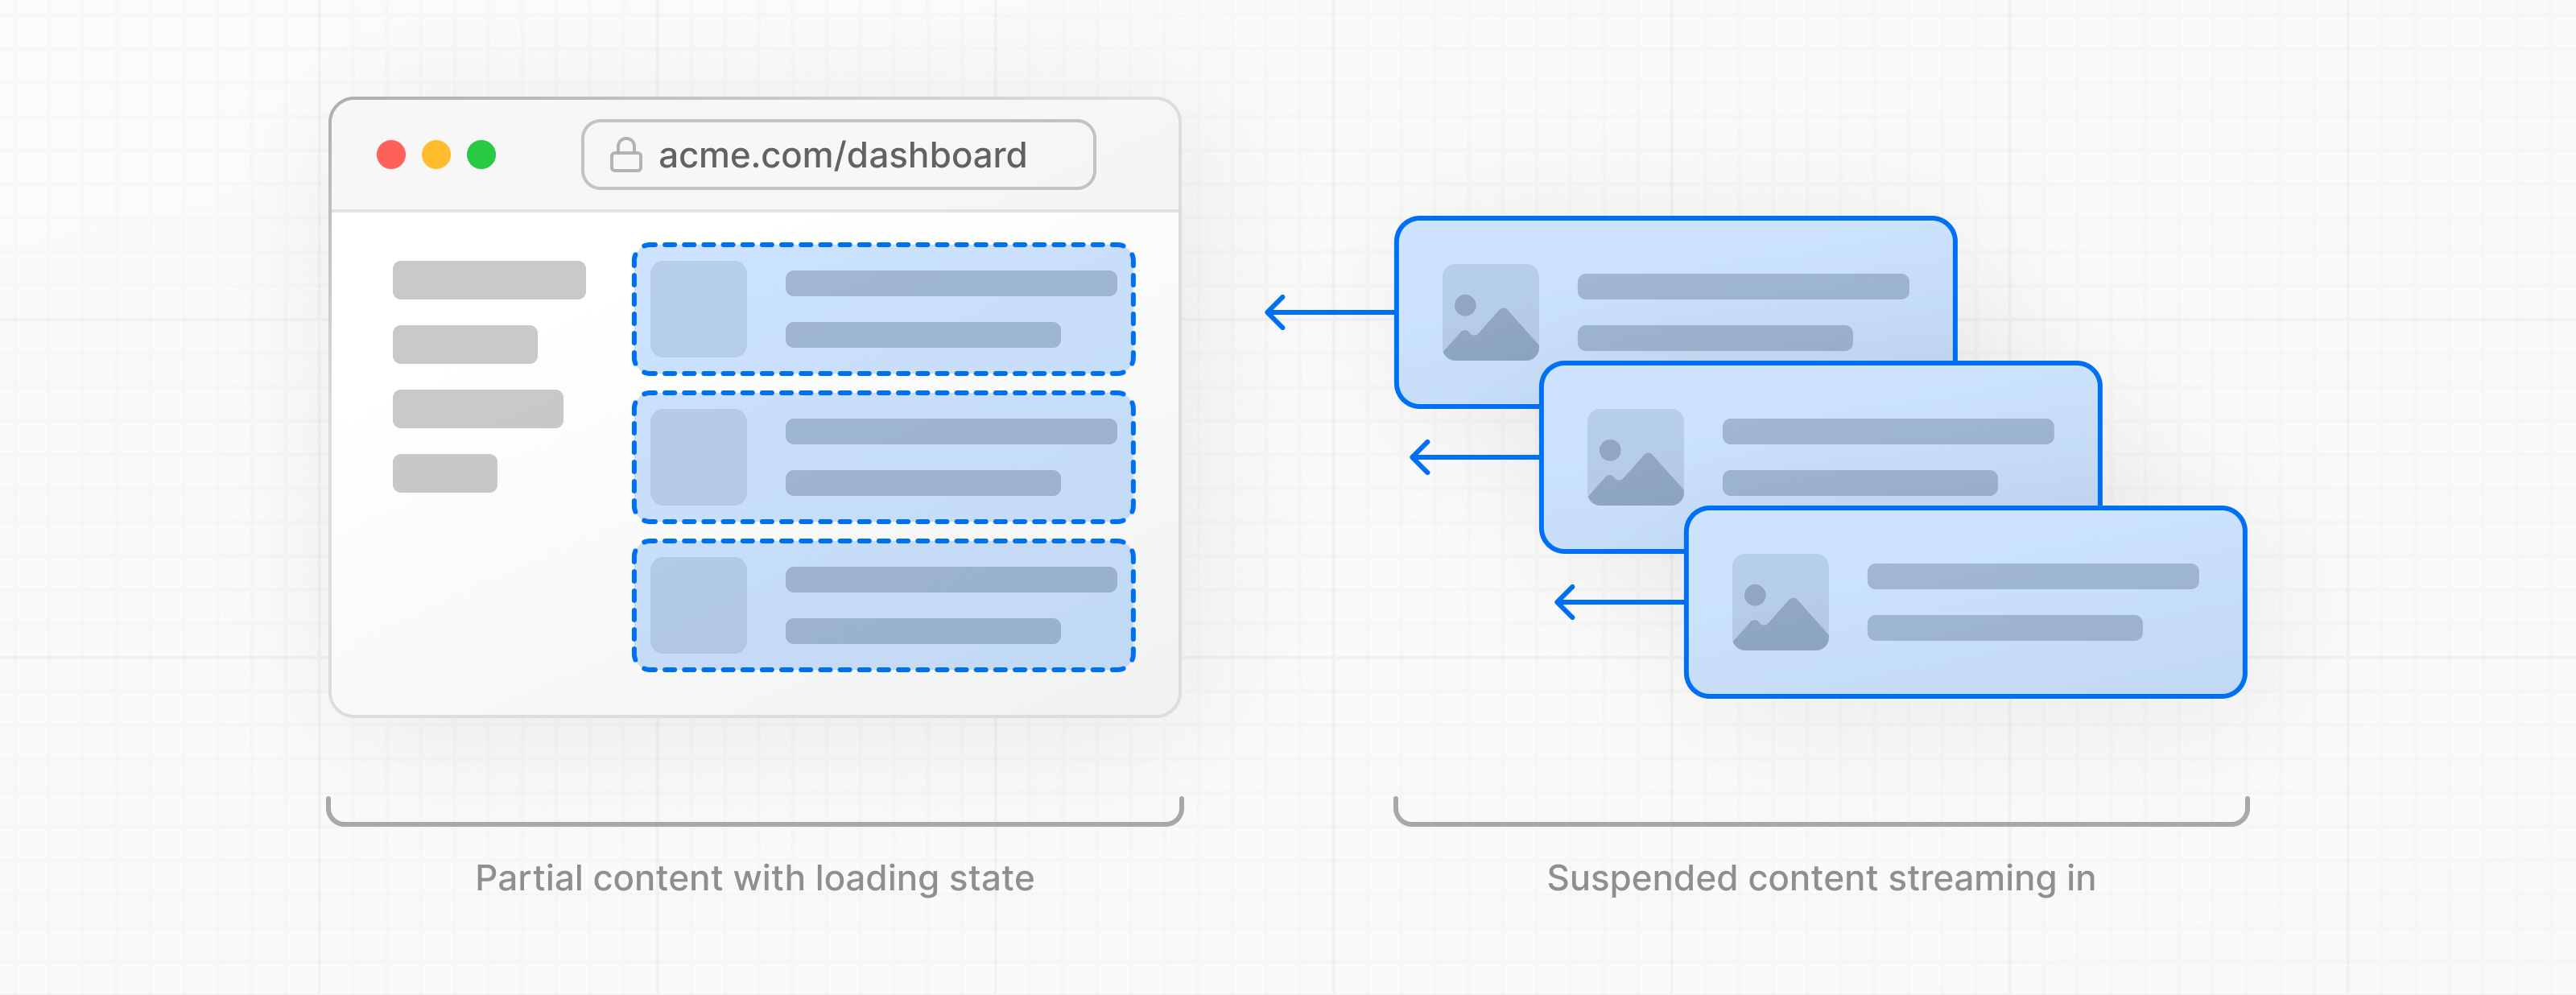
By streaming, you can prevent slow data requests from blocking your whole page. This allows the user to see and interact with parts of the page without waiting for all the data to load before any UI can be shown to the user.

Streaming works well with React's component model, as each component can be considered a chunk.
There are two ways you implement streaming in Next.js:
- At the page level, with the
loading.tsxfile. - For specific components, with
<Suspense>.
Let's see how this works.
Streaming a whole page with loading.tsx
In the /app/dashboard folder, create a new file called loading.tsx:
export default function Loading() {
return <div>Loading...</div>;
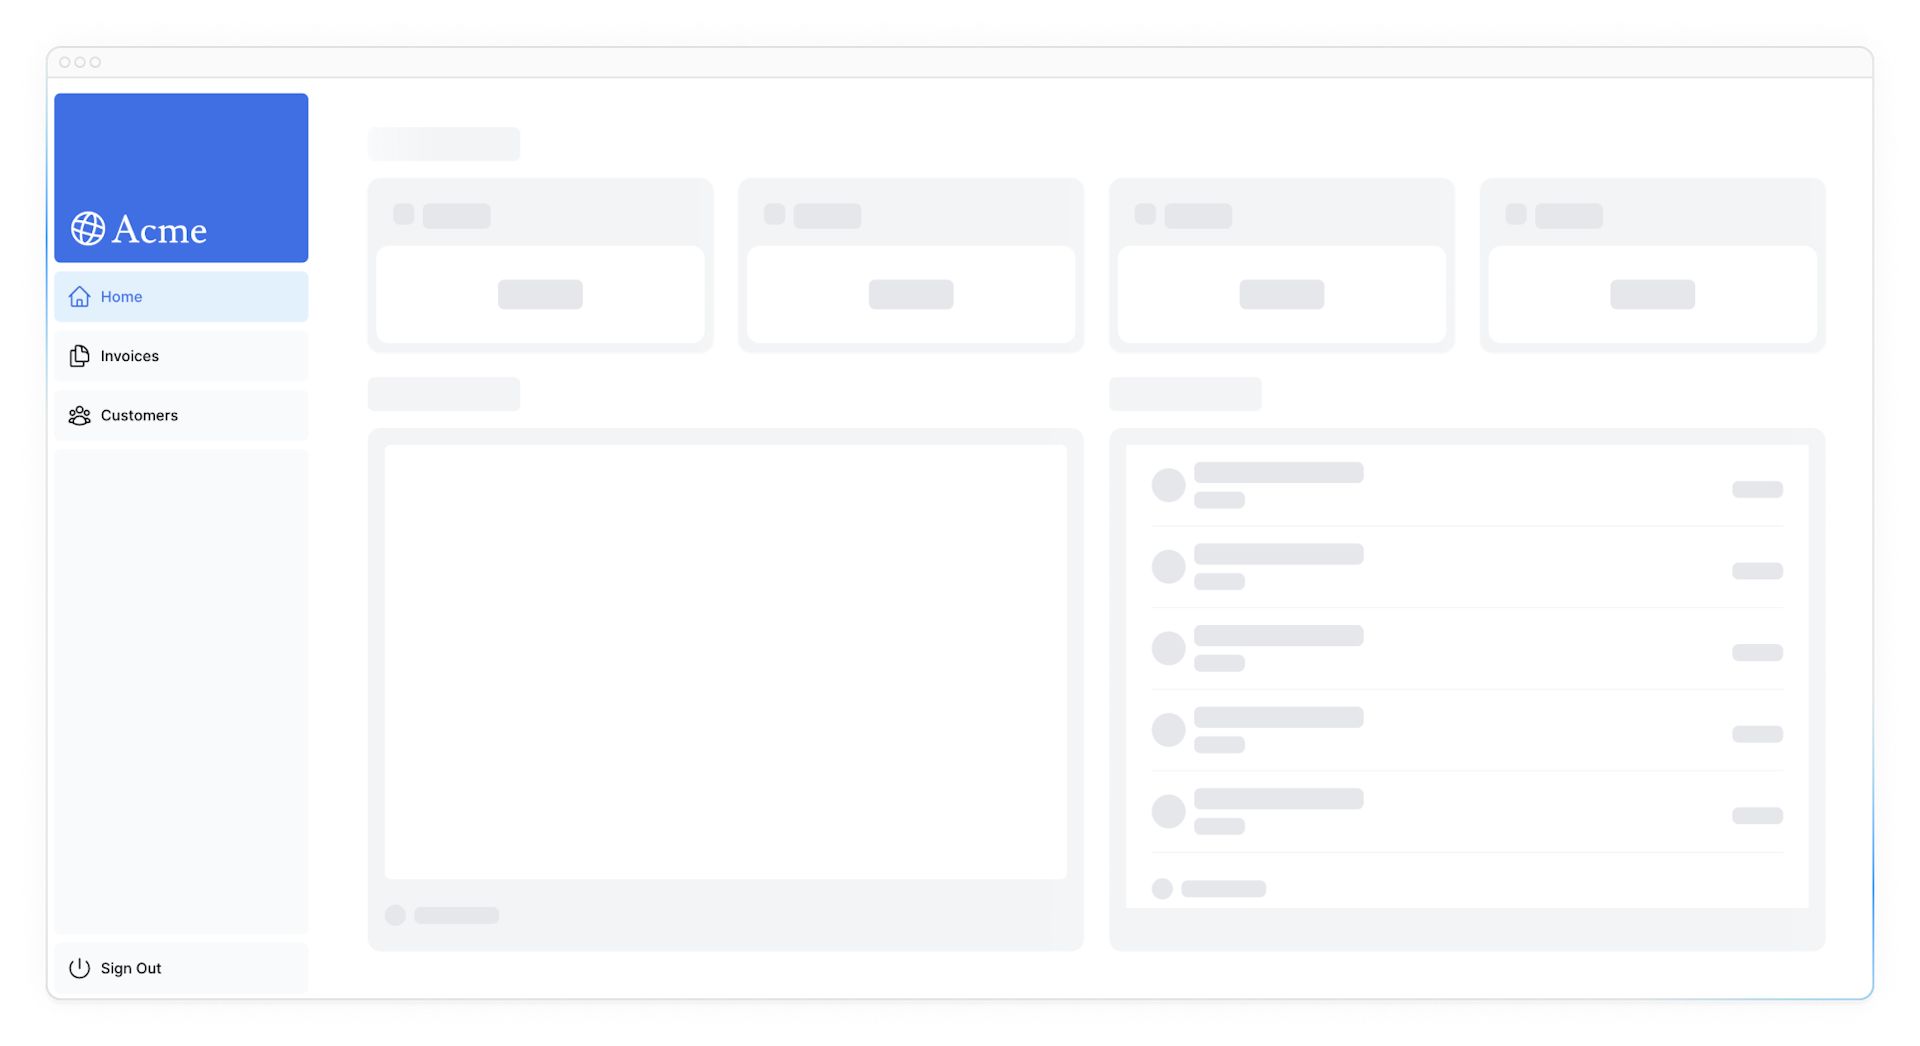
}Refresh http://localhost:3000/dashboard, and you should now see:

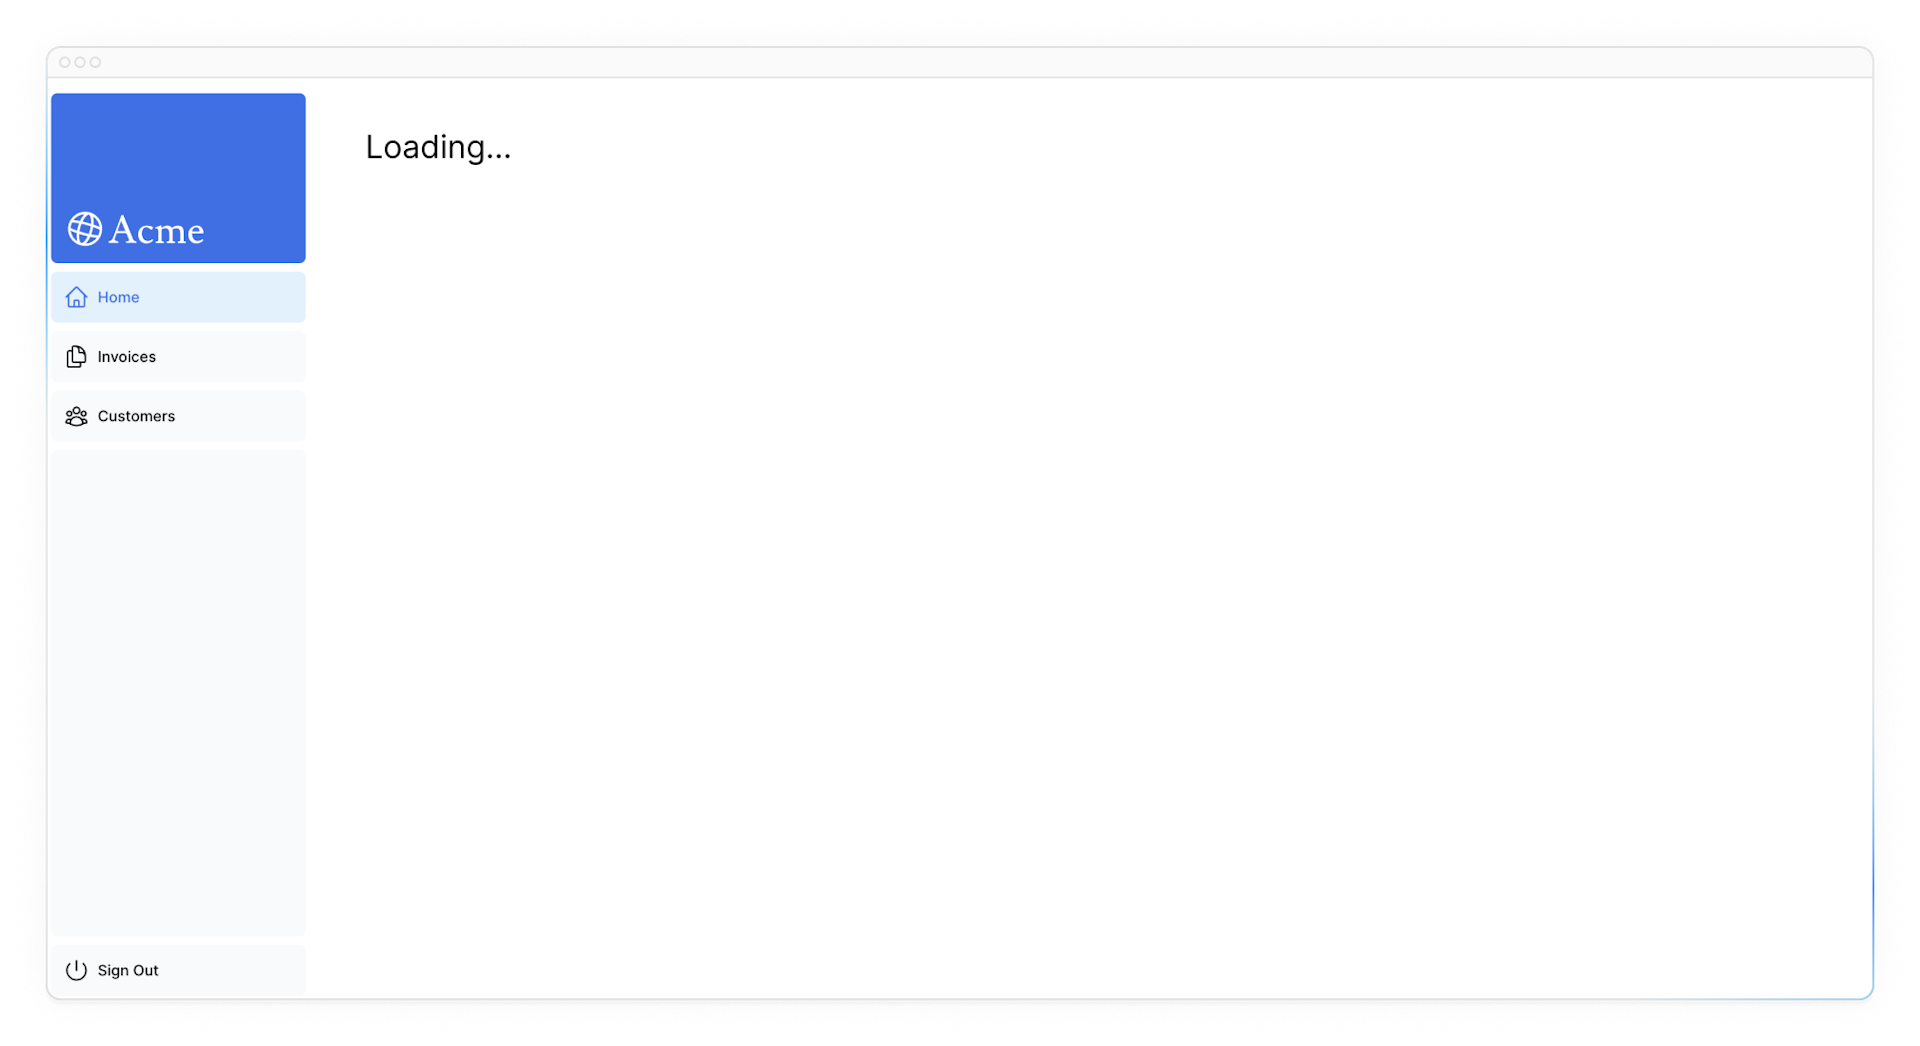
A few things are happening here:
loading.tsxis a special Next.js file built on top of Suspense, it allows you to create fallback UI to show as a replacement while page content loads.- Since
<SideNav>is static, it's shown immediately. The user can interact with<SideNav>while the dynamic content is loading. - The user doesn't have to wait for the page to finish loading before navigating away (this is called interruptable navigation).
Congratulations! You've just implemented streaming. But we can do more to improve the user experience. Let's show a loading skeleton instead of the Loading… text.
Adding loading skeletons
A loading skeleton is a simplified version of the UI. Many websites use them as a placeholder (or fallback) to indicate to users that the content is loading. Any UI you embed into loading.tsx will be embedded as part of the static file, and sent first. Then, the rest of the dynamic content will be streamed from the server to the client.
Inside your loading.tsx file, import a new component called <DashboardSkeleton>:
import DashboardSkeleton from '@/app/ui/skeletons';

export default function Loading() {
  return <DashboardSkeleton />;
}
Then, refresh http://localhost:3000/dashboard, and you should now see:

Fixing the loading skeleton bug with route groups
Right now, your loading skeleton will apply to the invoices and customers pages as well.
Since loading.tsx is a level higher than /invoices/page.tsx and /customers/page.tsx in the file system, it's also applied to those pages.
We can change this with Route Groups. Create a new folder called /(overview) inside the dashboard folder. Then, move your loading.tsx and page.tsx files inside the folder:


Now, the loading.tsx file will only apply to your dashboard overview page.
Route groups allow you to organize files into logical groups without affecting the URL path structure. When you create a new folder using parentheses (), the name won't be included in the URL path. So /dashboard/(overview)/page.tsx becomes /dashboard.
Here, you're using a route group to ensure loading.tsx only applies to your dashboard overview page. However, you can also use route groups to separate your application into sections (e.g. (marketing) routes and (shop) routes) or by teams for larger applications.
Streaming a component
So far, you're streaming a whole page. But, instead, you can be more granular and stream specific components using React Suspense.
Suspense allows you to defer rendering parts of your application until some condition is met (e.g. data is loaded). You can wrap your dynamic components in Suspense. Then, pass it a fallback component to show while the dynamic component loads.
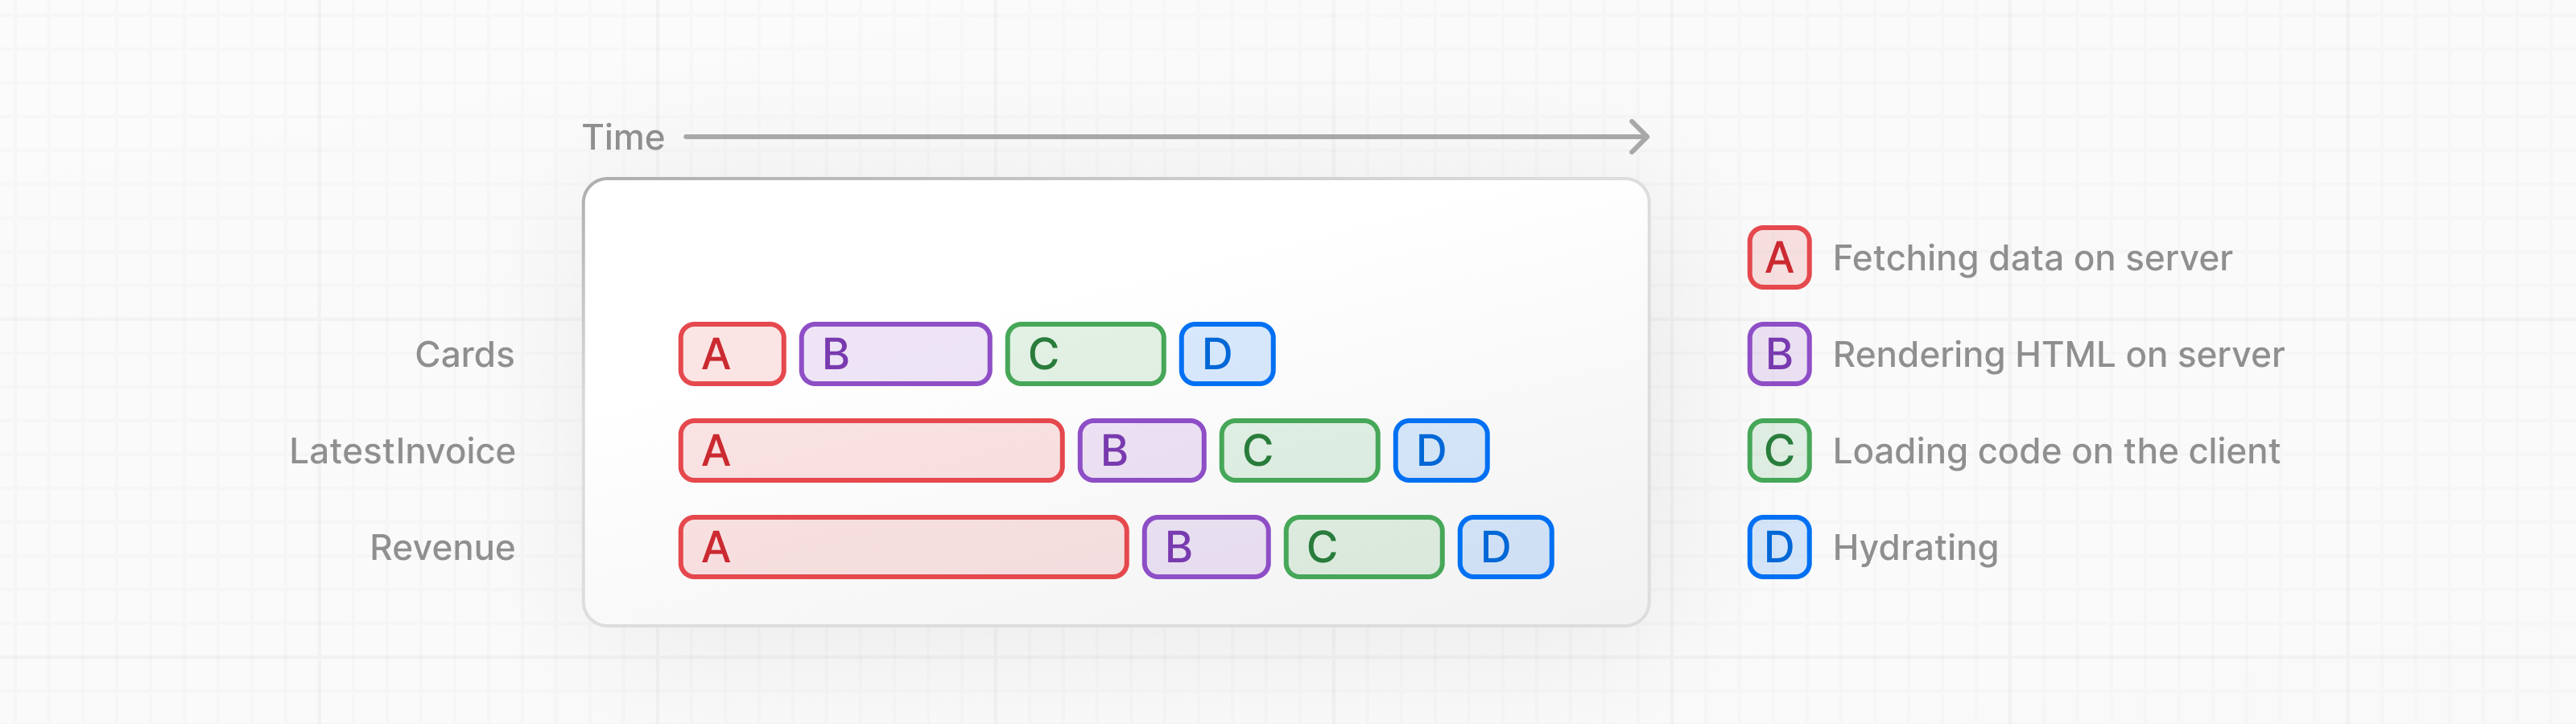
If you remember the slow data request, fetchRevenue(), this is the request that is slowing down the whole page. Instead of blocking your page, you can use Suspense to stream only this component and immediately show the rest of the page's UI.
To do so, you'll need to move the data fetch to the component, let's update the code to see what that'll look like:
Delete all instances of fetchRevenue() and its data from /dashboard/(overview)/page.tsx:
import { Card } from '@/app/ui/dashboard/cards';
import RevenueChart from '@/app/ui/dashboard/revenue-chart';
import LatestInvoices from '@/app/ui/dashboard/latest-invoices';
import { lusitana } from '@/app/ui/fonts';
import { fetchLatestInvoices, fetchCardData } from '@/app/lib/data'; // remove fetchRevenue

export default async function Page() {
  const revenue = await fetchRevenue // delete this line
  const latestInvoices = await fetchLatestInvoices();
  const {
    numberOfInvoices,
    numberOfCustomers,
    totalPaidInvoices,
    totalPendingInvoices,
  } = await fetchCardData();

  return (
    // ...
  );
}
Then, import <Suspense> from React, and wrap it around <RevenueChart />. You can pass it a fallback component called <RevenueChartSkeleton>.
import { Card } from '@/app/ui/dashboard/cards';
import RevenueChart from '@/app/ui/dashboard/revenue-chart';
import LatestInvoices from '@/app/ui/dashboard/latest-invoices';
import { lusitana } from '@/app/ui/fonts';
import { fetchLatestInvoices, fetchCardData } from '@/app/lib/data';
import { Suspense } from 'react';
import { RevenueChartSkeleton } from '@/app/ui/skeletons';

export default async function Page() {
  const latestInvoices = await fetchLatestInvoices();
  const {
    numberOfInvoices,
    numberOfCustomers,
    totalPaidInvoices,
    totalPendingInvoices,
  } = await fetchCardData();

  return (
    <main>
      <h1 className={`${lusitana.className} mb-4 text-xl md:text-2xl`}>
        Dashboard
      </h1>
      <div className="grid gap-6 sm:grid-cols-2 lg:grid-cols-4">
        <Card title="Collected" value={totalPaidInvoices} type="collected" />
        <Card title="Pending" value={totalPendingInvoices} type="pending" />
        <Card title="Total Invoices" value={numberOfInvoices} type="invoices" />
        <Card
          title="Total Customers"
          value={numberOfCustomers}
          type="customers"
        />
      </div>
      <div className="mt-6 grid grid-cols-1 gap-6 md:grid-cols-4 lg:grid-cols-8">
        <Suspense fallback={<RevenueChartSkeleton />}>
          <RevenueChart />
        </Suspense>
        <LatestInvoices latestInvoices={latestInvoices} />
      </div>
    </main>
  );
}
Finally, update the <RevenueChart> component to fetch its own data and remove the prop passed to it:
import { generateYAxis } from '@/app/lib/utils';
import { CalendarIcon } from '@heroicons/react/24/outline';
import { lusitana } from '@/app/ui/fonts';
import { fetchRevenue } from '@/app/lib/data';

// ...

export default async function RevenueChart() { // Make component async, remove the props
  const revenue = await fetchRevenue(); // Fetch data inside the component

  const chartHeight = 350;
  const { yAxisLabels, topLabel } = generateYAxis(revenue);

  if (!revenue || revenue.length === 0) {
    return <p className="mt-4 text-gray-400">No data available.</p>;
  }

  return (
    // ...
  );
}
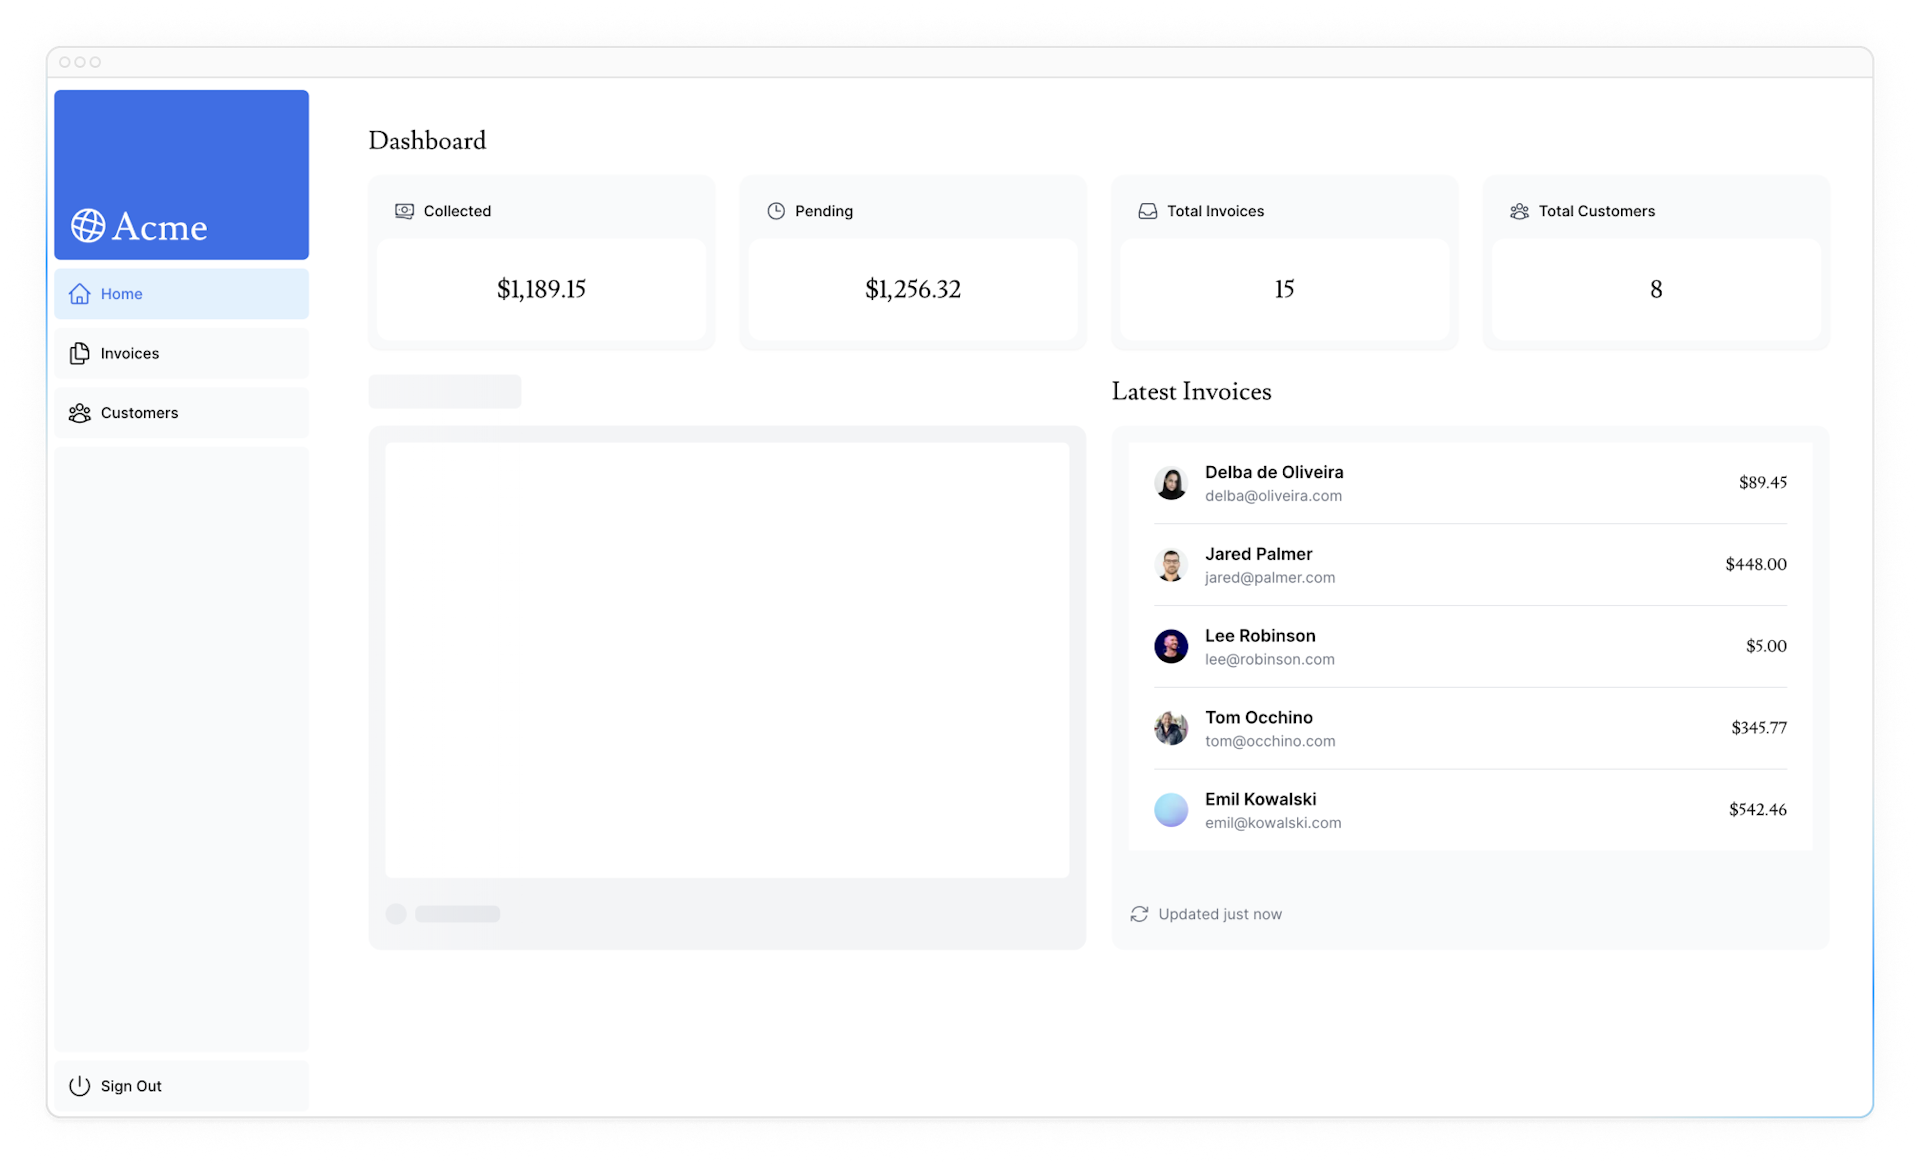
Now refresh the page, you should see the dashboard information almost immediately, while a fallback skeleton is shown for <RevenueChart>:

Practice: Streaming <LatestInvoices>
Now it's your turn! Practice what you've just learned by streaming the <LatestInvoices> component.
Move fetchLatestInvoices() down from the page to the <LatestInvoices> component. Wrap the component in a <Suspense> boundary with a fallback called <LatestInvoicesSkeleton>.
Once you're ready, expand the toggle to see the solution code:
Grouping components
Great! You're almost there, now you need to wrap the <Card> components in Suspense. You can fetch data for each individual card, but this could lead to a popping effect as the cards load in, this can be visually jarring for the user.
So, how would you tackle this problem?
To create more of a staggered effect, you can group the cards using a wrapper component. This means the static <SideNav/> will be shown first, followed by the cards, etc.
In your page.tsx file:
- Delete your
<Card>components. - Delete the
fetchCardData()function. - Import a new wrapper component called
<CardWrapper />. - Import a new skeleton component called
<CardsSkeleton />. - Wrap
<CardWrapper />in Suspense.
import CardWrapper from '@/app/ui/dashboard/cards';
// ...
import {
  RevenueChartSkeleton,
  LatestInvoicesSkeleton,
  CardsSkeleton,
} from '@/app/ui/skeletons';

export default async function Page() {
  return (
    <main>
      <h1 className={`${lusitana.className} mb-4 text-xl md:text-2xl`}>
        Dashboard
      </h1>
      <div className="grid gap-6 sm:grid-cols-2 lg:grid-cols-4">
        <Suspense fallback={<CardsSkeleton />}>
          <CardWrapper />
        </Suspense>
      </div>
      // ...
    </main>
  );
}
Then, move into the file /app/ui/dashboard/cards.tsx, import the fetchCardData() function, and invoke it inside the <CardWrapper/> component. Make sure to uncomment any necessary code in this component.
// ...
import { fetchCardData } from '@/app/lib/data';

// ...

export default async function CardWrapper() {
  const {
    numberOfInvoices,
    numberOfCustomers,
    totalPaidInvoices,
    totalPendingInvoices,
  } = await fetchCardData();

  return (
    <>
      <Card title="Collected" value={totalPaidInvoices} type="collected" />
      <Card title="Pending" value={totalPendingInvoices} type="pending" />
      <Card title="Total Invoices" value={numberOfInvoices} type="invoices" />
      <Card
        title="Total Customers"
        value={numberOfCustomers}
        type="customers"
      />
    </>
  );
}
Refresh the page, and you should see all the cards load in at the same time. You can use this pattern when you want multiple components to load in at the same time.
Deciding where to place your Suspense boundaries
Where you place your Suspense boundaries will depend on a few things:
- How you want the user to experience the page as it streams.
- What content you want to prioritize.
- If the components rely on data fetching.
Take a look at your dashboard page, is there anything you would've done differently?
Don't worry. There isn't a right answer.
- You could stream the whole page like we did with
loading.tsx... but that may lead to a longer loading time if one of the components has a slow data fetch. - You could stream every component individually... but that may lead to UI popping into the screen as it becomes ready.
- You could also create a staggered effect by streaming page sections. But you'll need to create wrapper components.
Where you place your suspense boundaries will vary depending on your application. In general, it's good practice to move your data fetches down to the components that need it, and then wrap those components in Suspense. But there is nothing wrong with streaming the sections or the whole page if that's what your application needs.
Don't be afraid to experiment with Suspense and see what works best, it's a powerful API that can help you create more delightful user experiences.
Looking ahead
Streaming and Server Components give us new ways to handle data fetching and loading states, ultimately with the goal of improving the end user experience.
In the next chapter, you'll learn about Partial Prerendering, a new Next.js rendering model built with streaming in mind.
You've Completed Chapter 9
You've learned how to stream components with Suspense and loading skeletons.
Was this helpful?