4
Chapter 4
Creating Layouts and Pages
So far, your application only has a home page. Let's learn how you can create more routes with layouts and pages.
In this chapter...
Here are the topics we’ll cover
Create the dashboard routes using file-system routing.
Understand the role of folders and files when creating new route segments.
Create a nested layout that can be shared between multiple dashboard pages.
Understand what colocation, partial rendering, and the root layout are.
Nested routing
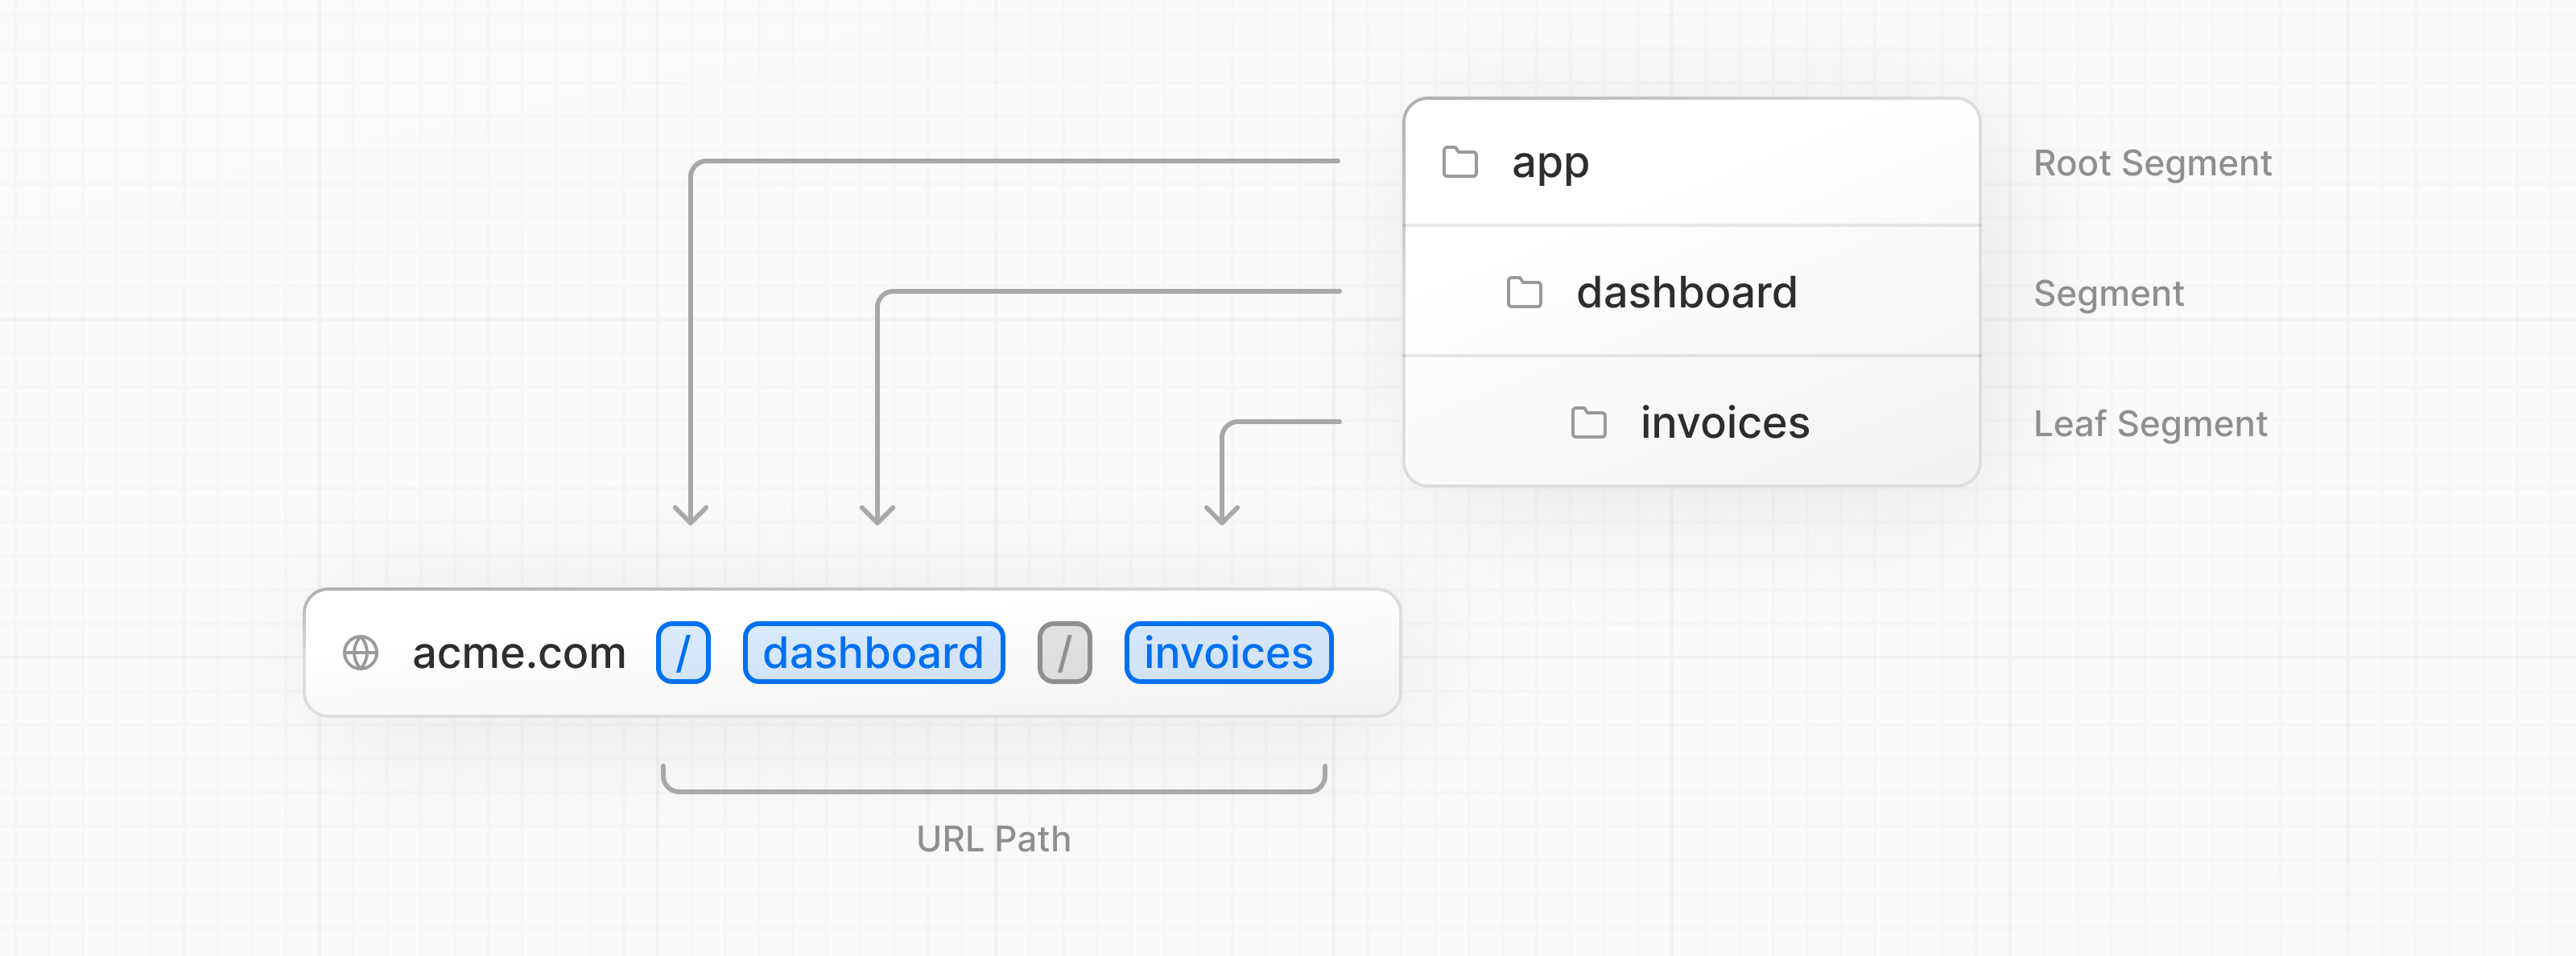
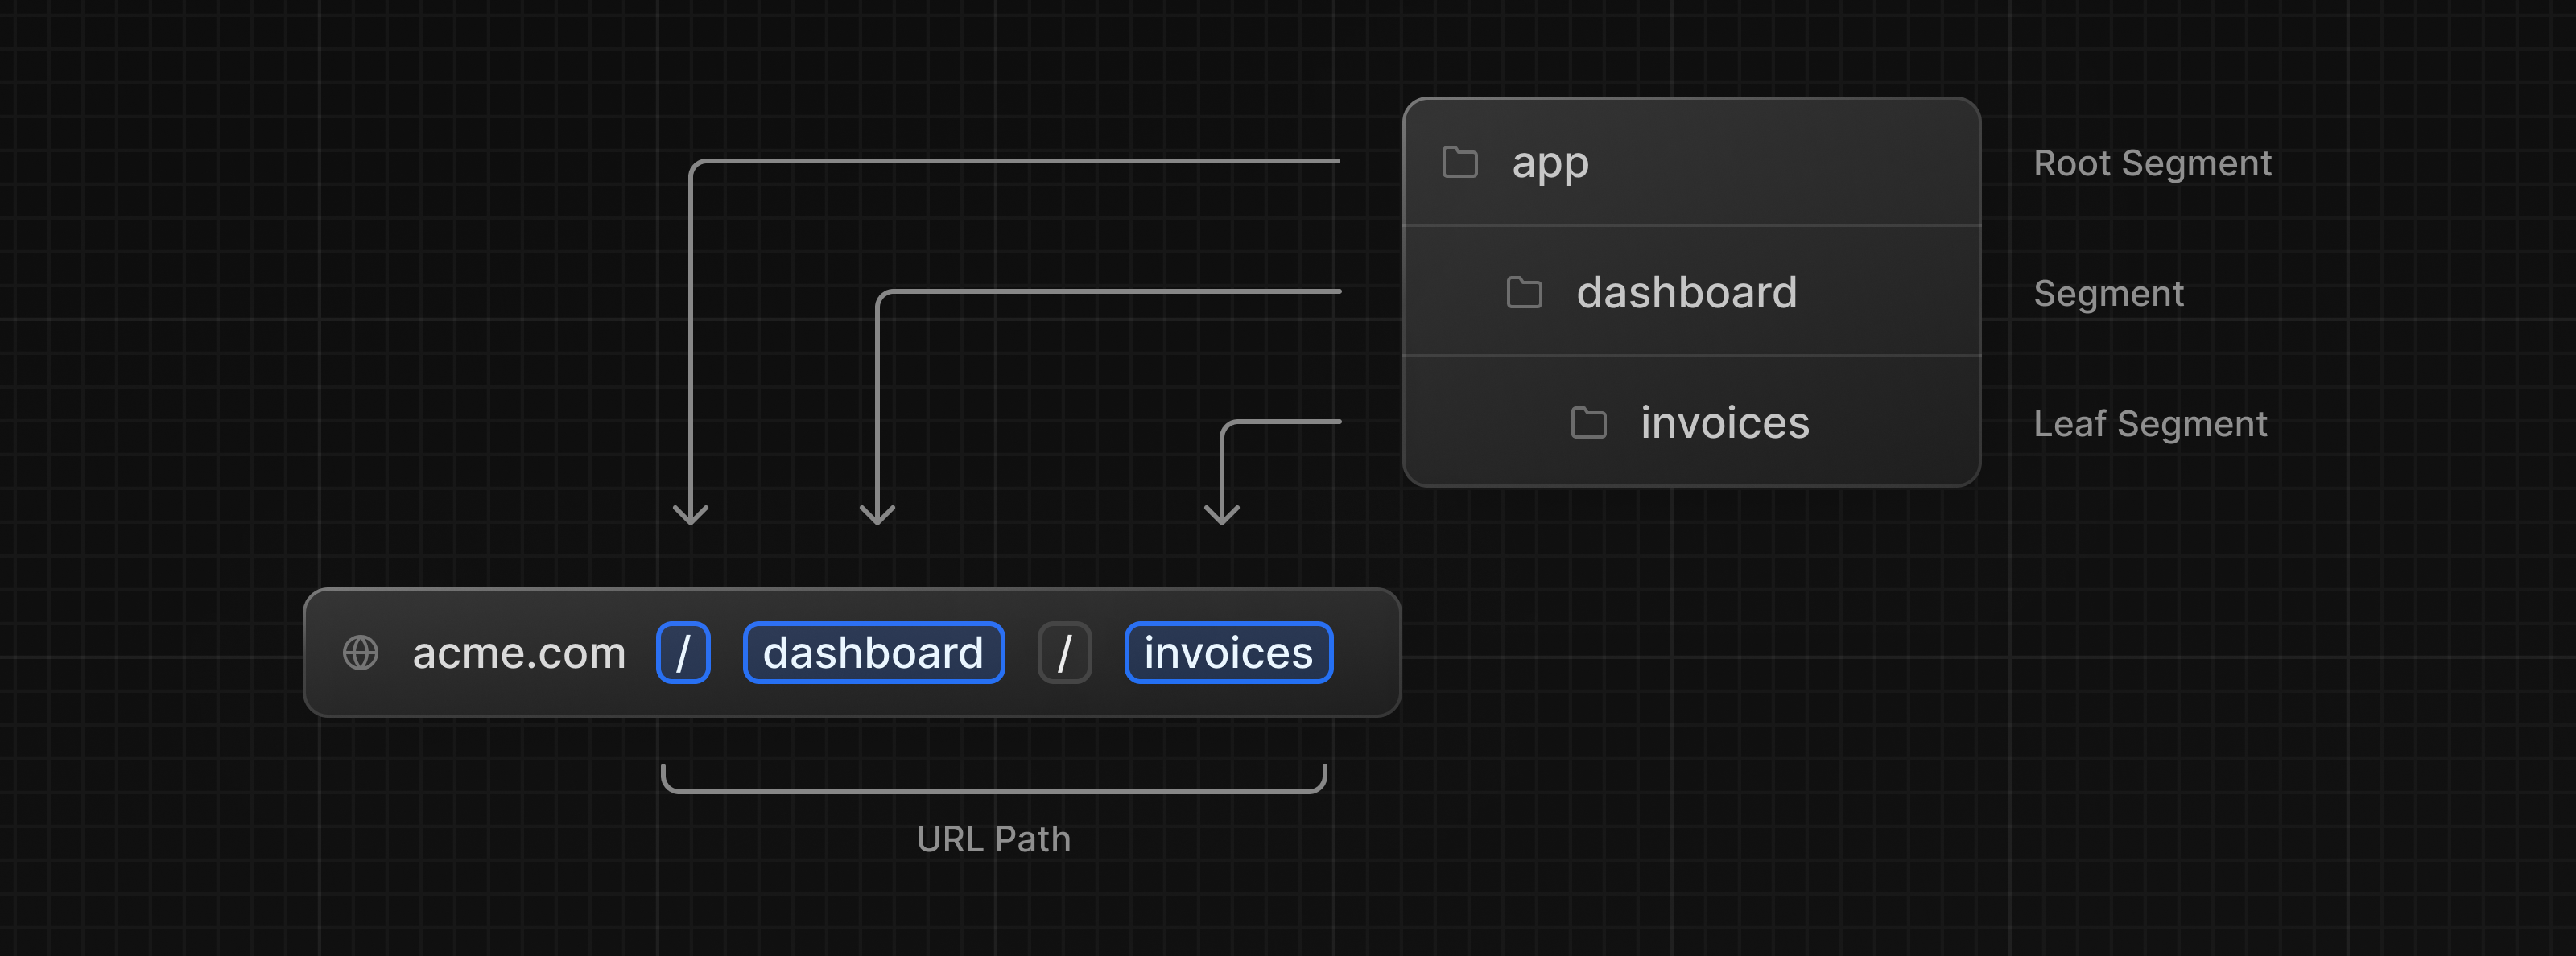
Next.js uses file-system routing where folders are used to create nested routes. Each folder represents a route segment that maps to a URL segment.
You can create separate UIs for each route using layout.tsx and page.tsx files.
page.tsx is a special Next.js file that exports a React component, and it's required for the route to be accessible. In your application, you already have a page file: /app/page.tsx - this is the home page associated with the route /.
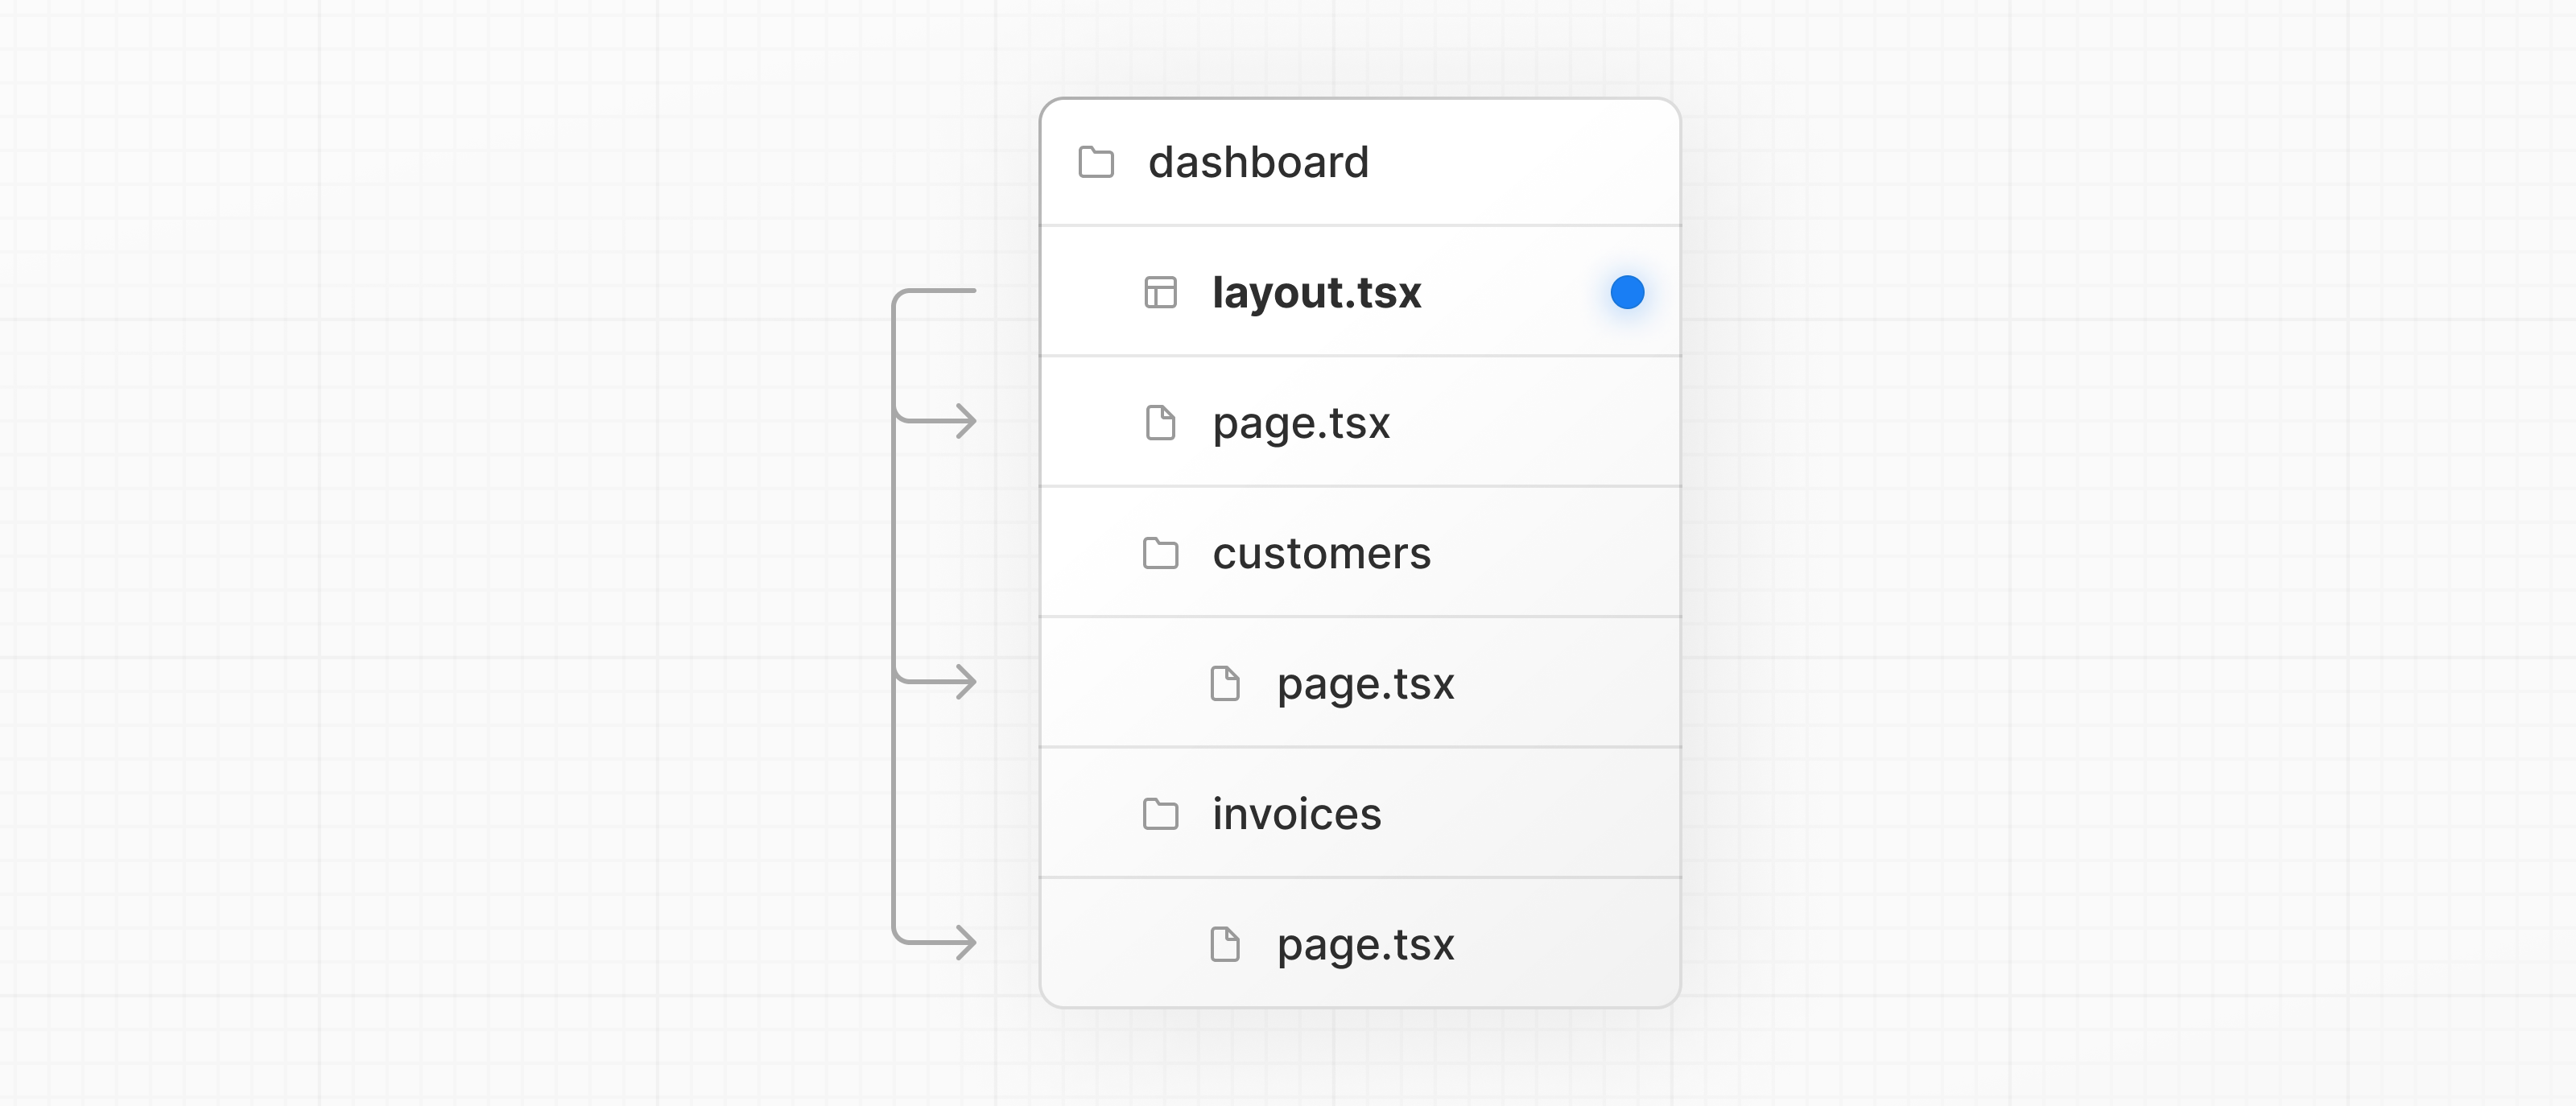
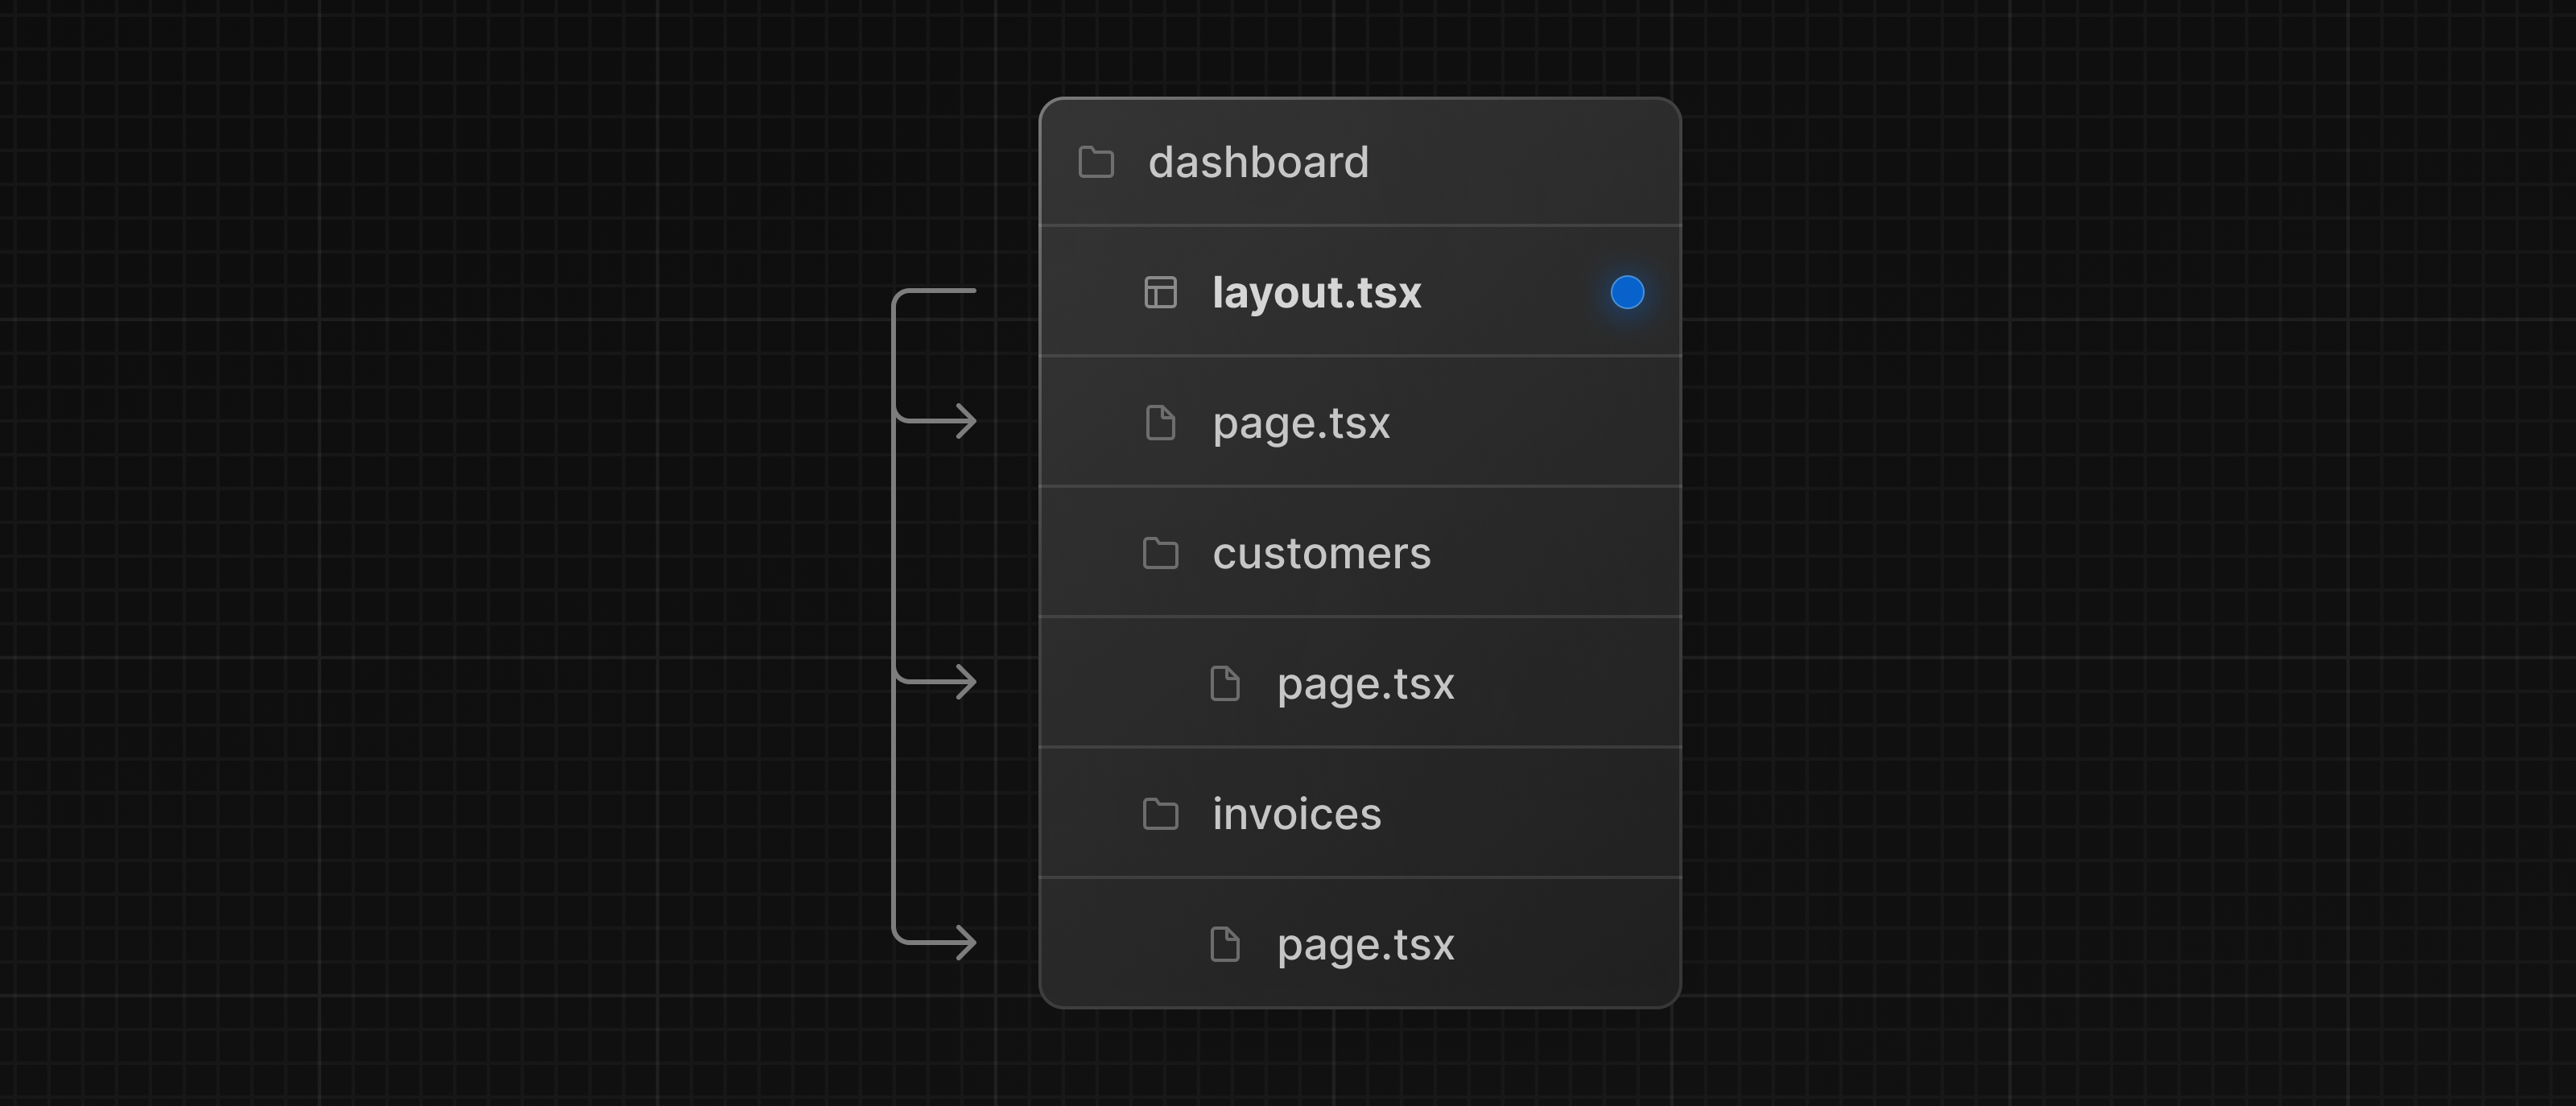
To create a nested route, you can nest folders inside each other and add page.tsx files inside them. For example:
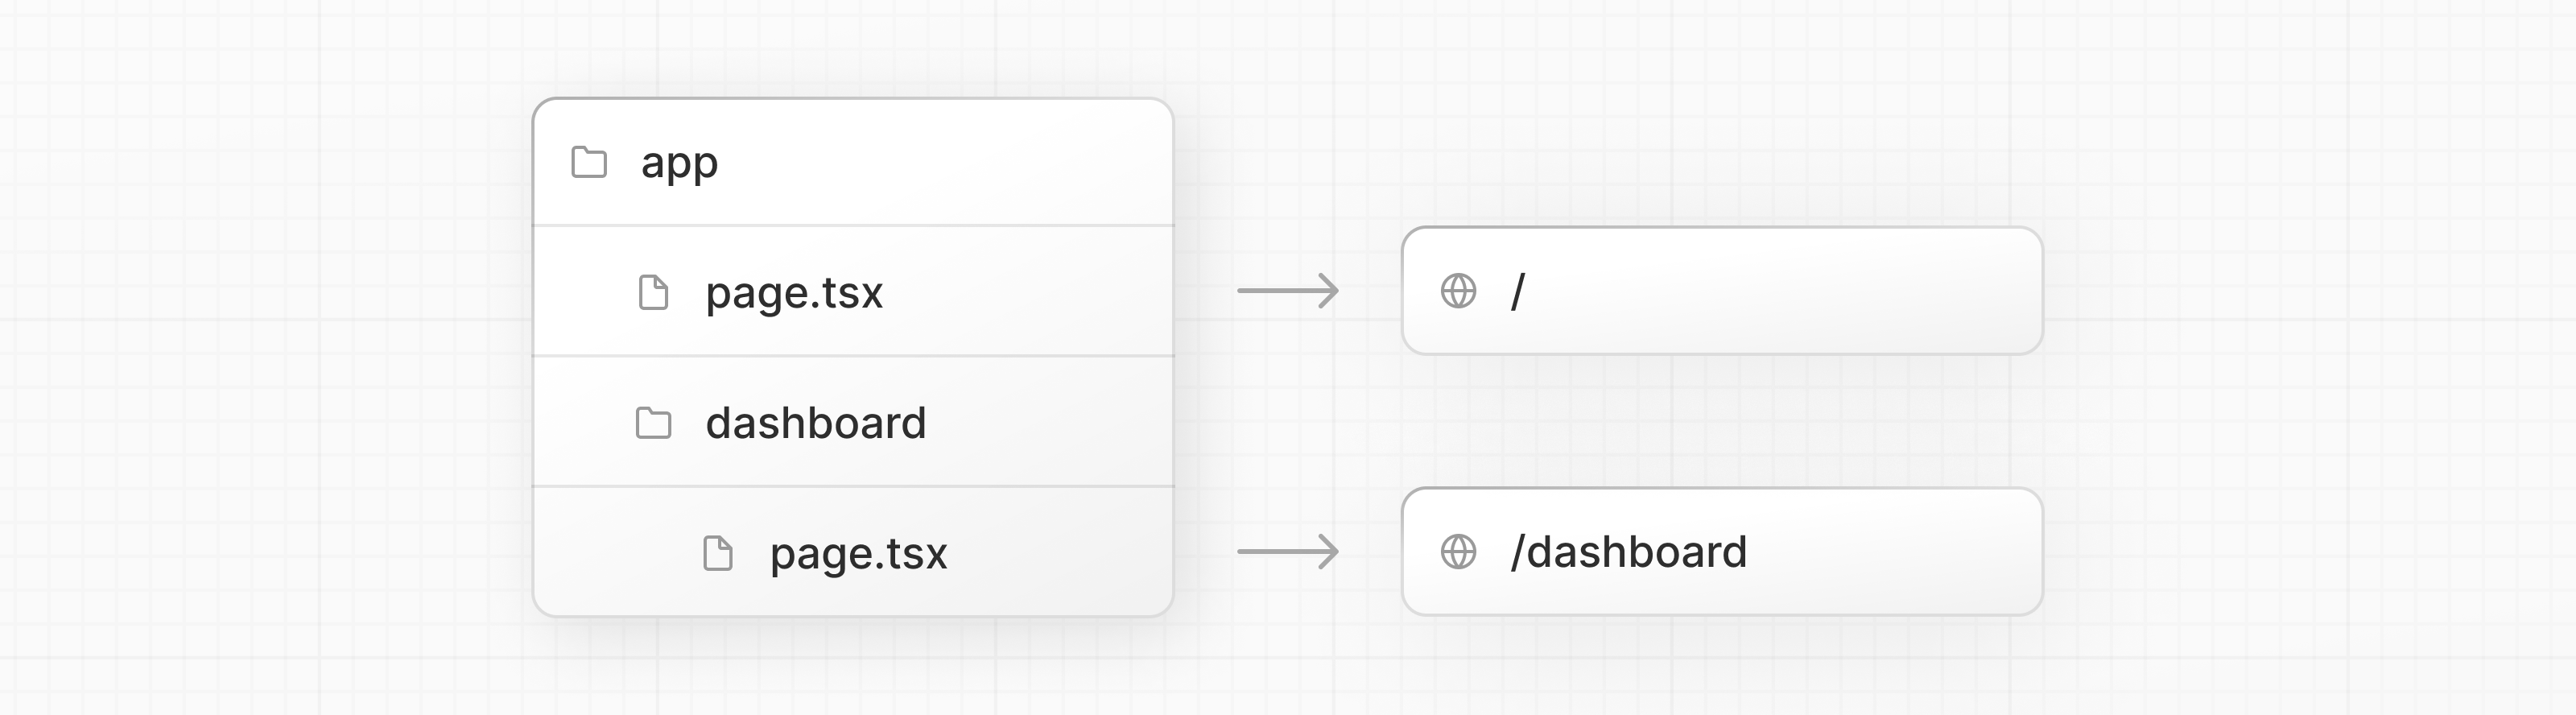
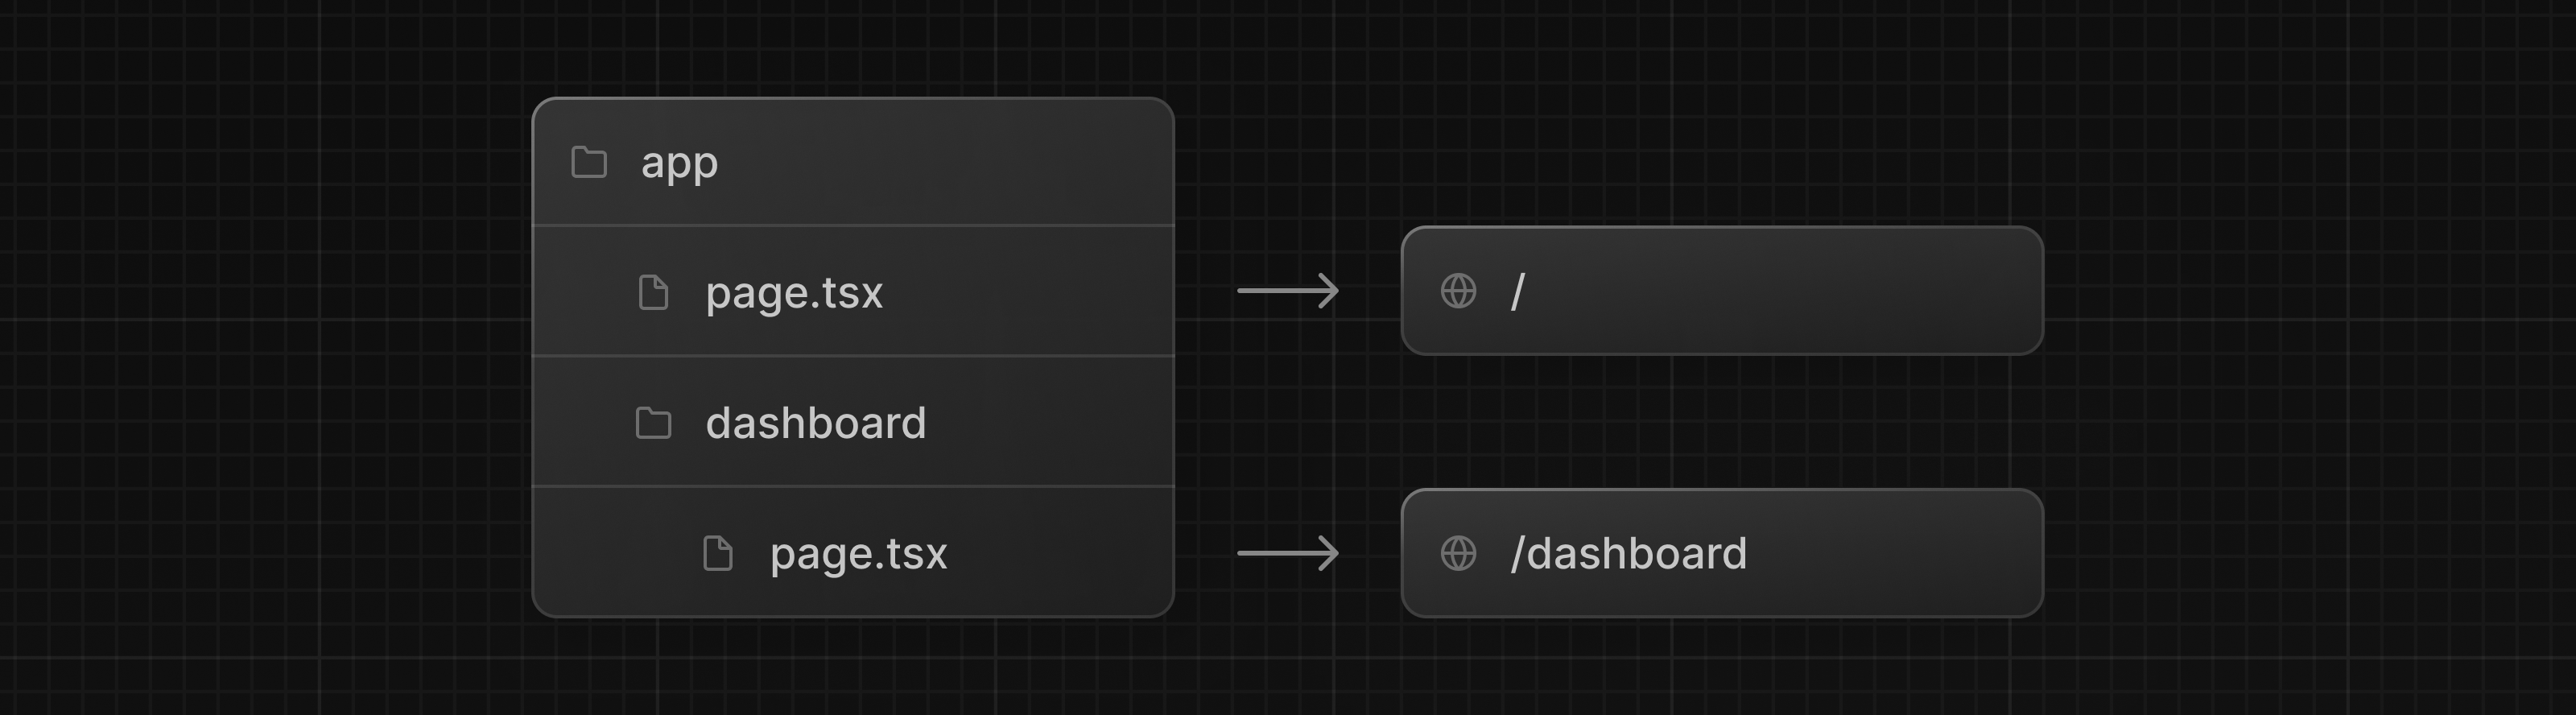
/app/dashboard/page.tsx is associated with the /dashboard path. Let's create the page to see how it works!
Creating the dashboard page
Create a new folder called dashboard inside /app. Then, create a new page.tsx file inside the dashboard folder with the following content:
export default function Page() {
  return <p>Dashboard Page</p>;
}
Now, make sure that the development server is running and visit http://localhost:3000/dashboard. You should see the "Dashboard Page" text.
This is how you can create different pages in Next.js: create a new route segment using a folder, and add a page file inside it.
By having a special name for page files, Next.js allows you to colocate UI components, test files, and other related code with your routes. Only the content inside the page file will be publicly accessible. For example, the /ui and /lib folders are colocated inside the /app folder along with your routes.
Practice: Creating the dashboard pages
Let's practice creating more routes. In your dashboard, create two more pages:
- Customers Page: The page should be accessible on http://localhost:3000/dashboard/customers. For now, it should return a
<p>Customers Page</p>element. - Invoices Page: The invoices page should be accessible on http://localhost:3000/dashboard/invoices. For now, also return a
<p>Invoices Page</p>element.
Spend some time tackling this exercise, and when you're ready, expand the toggle below for the solution:
Creating the dashboard layout
Dashboards have some sort of navigation that is shared across multiple pages. In Next.js, you can use a special layout.tsx file to create UI that is shared between multiple pages. Let's create a layout for the dashboard pages!
Inside the /dashboard folder, add a new file called layout.tsx and paste the following code:
import SideNav from '@/app/ui/dashboard/sidenav';

export default function Layout({ children }: { children: React.ReactNode }) {
  return (
    <div className="flex h-screen flex-col md:flex-row md:overflow-hidden">
      <div className="w-full flex-none md:w-64">
        <SideNav />
      </div>
      <div className="flex-grow p-6 md:overflow-y-auto md:p-12">{children}</div>
    </div>
  );
}
A few things are going on in this code, so let's break it down:
First, you're importing the <SideNav /> component into your layout. Any components you import into this file will be part of the layout.
The <Layout /> component receives a children prop. This child can either be a page or another layout. In your case, the pages inside /dashboard will automatically be nested inside a <Layout /> like so:
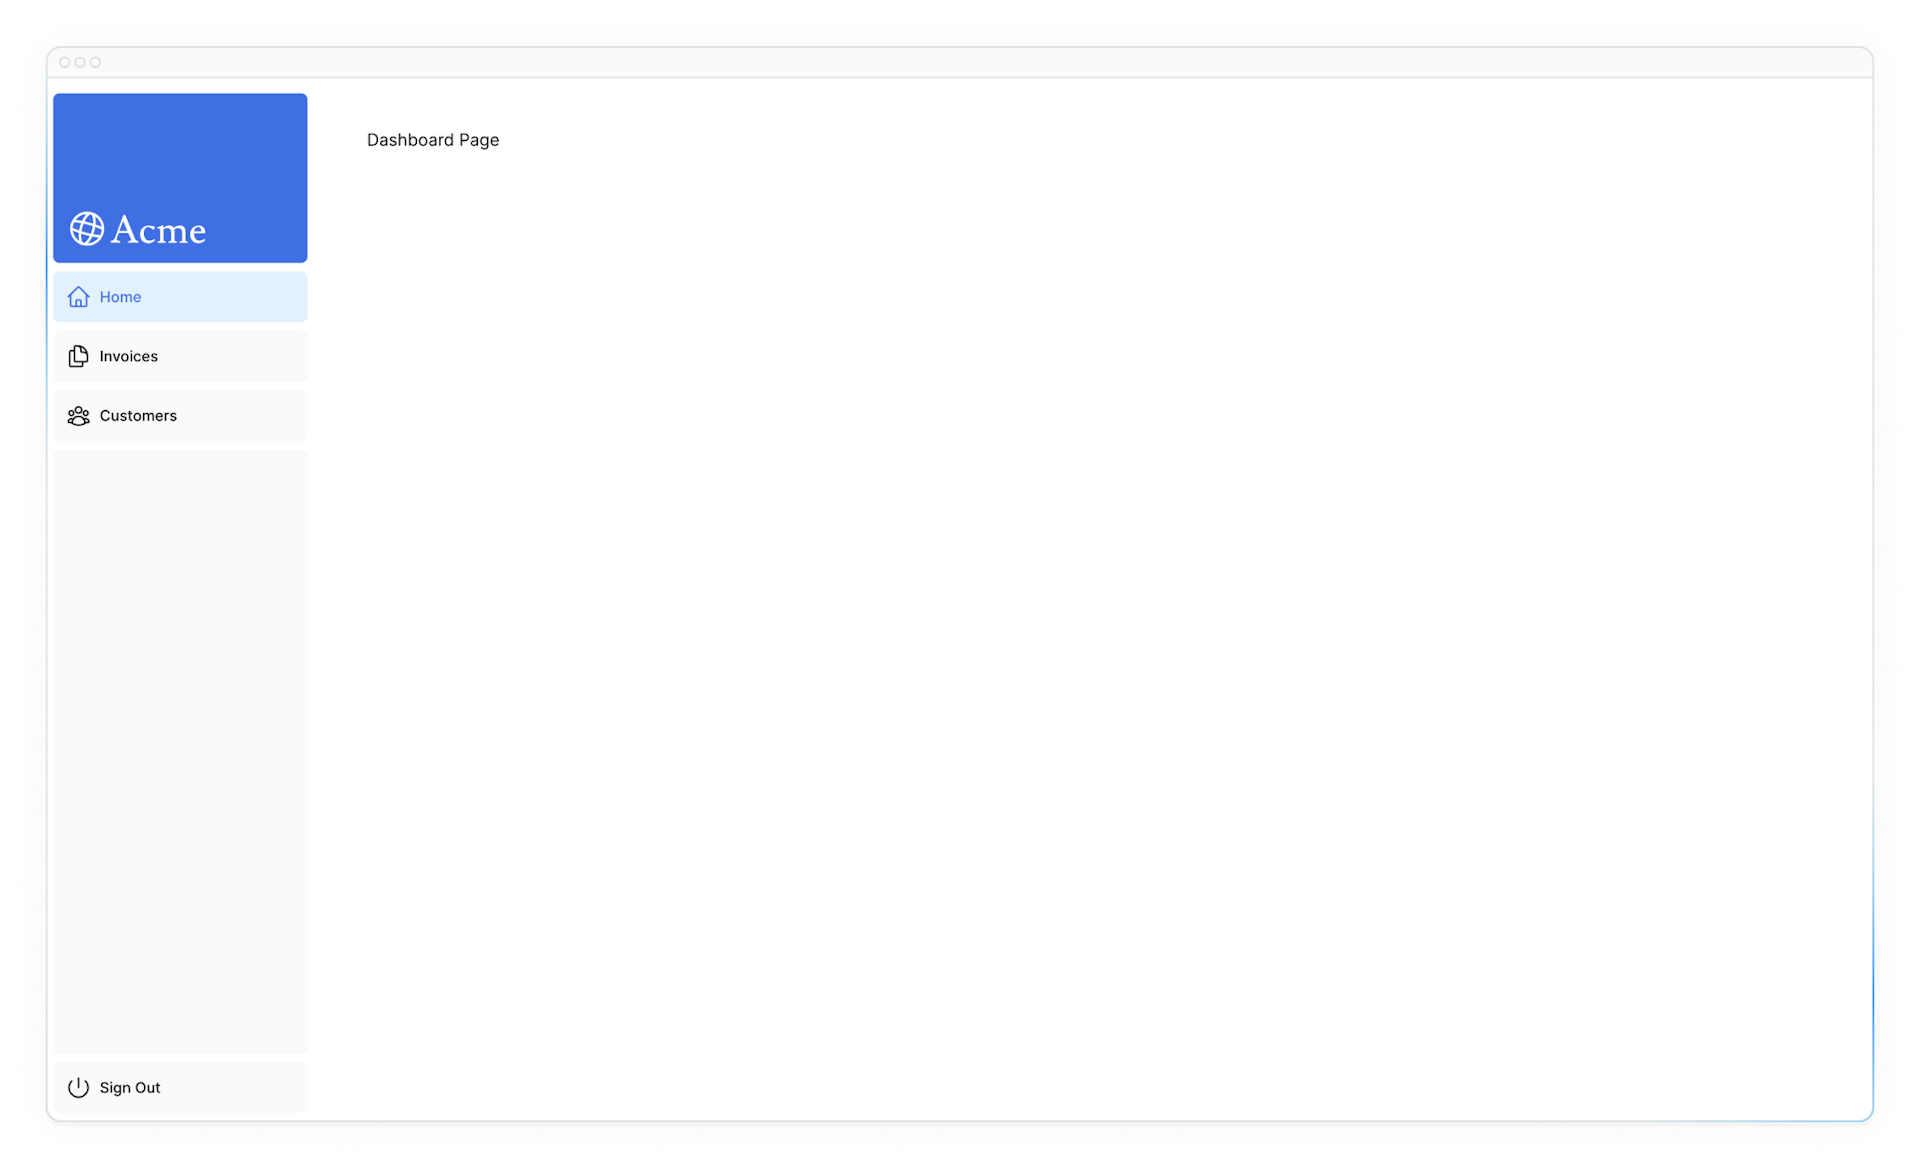
Check that everything is working correctly by saving your changes and checking your localhost. You should see the following:

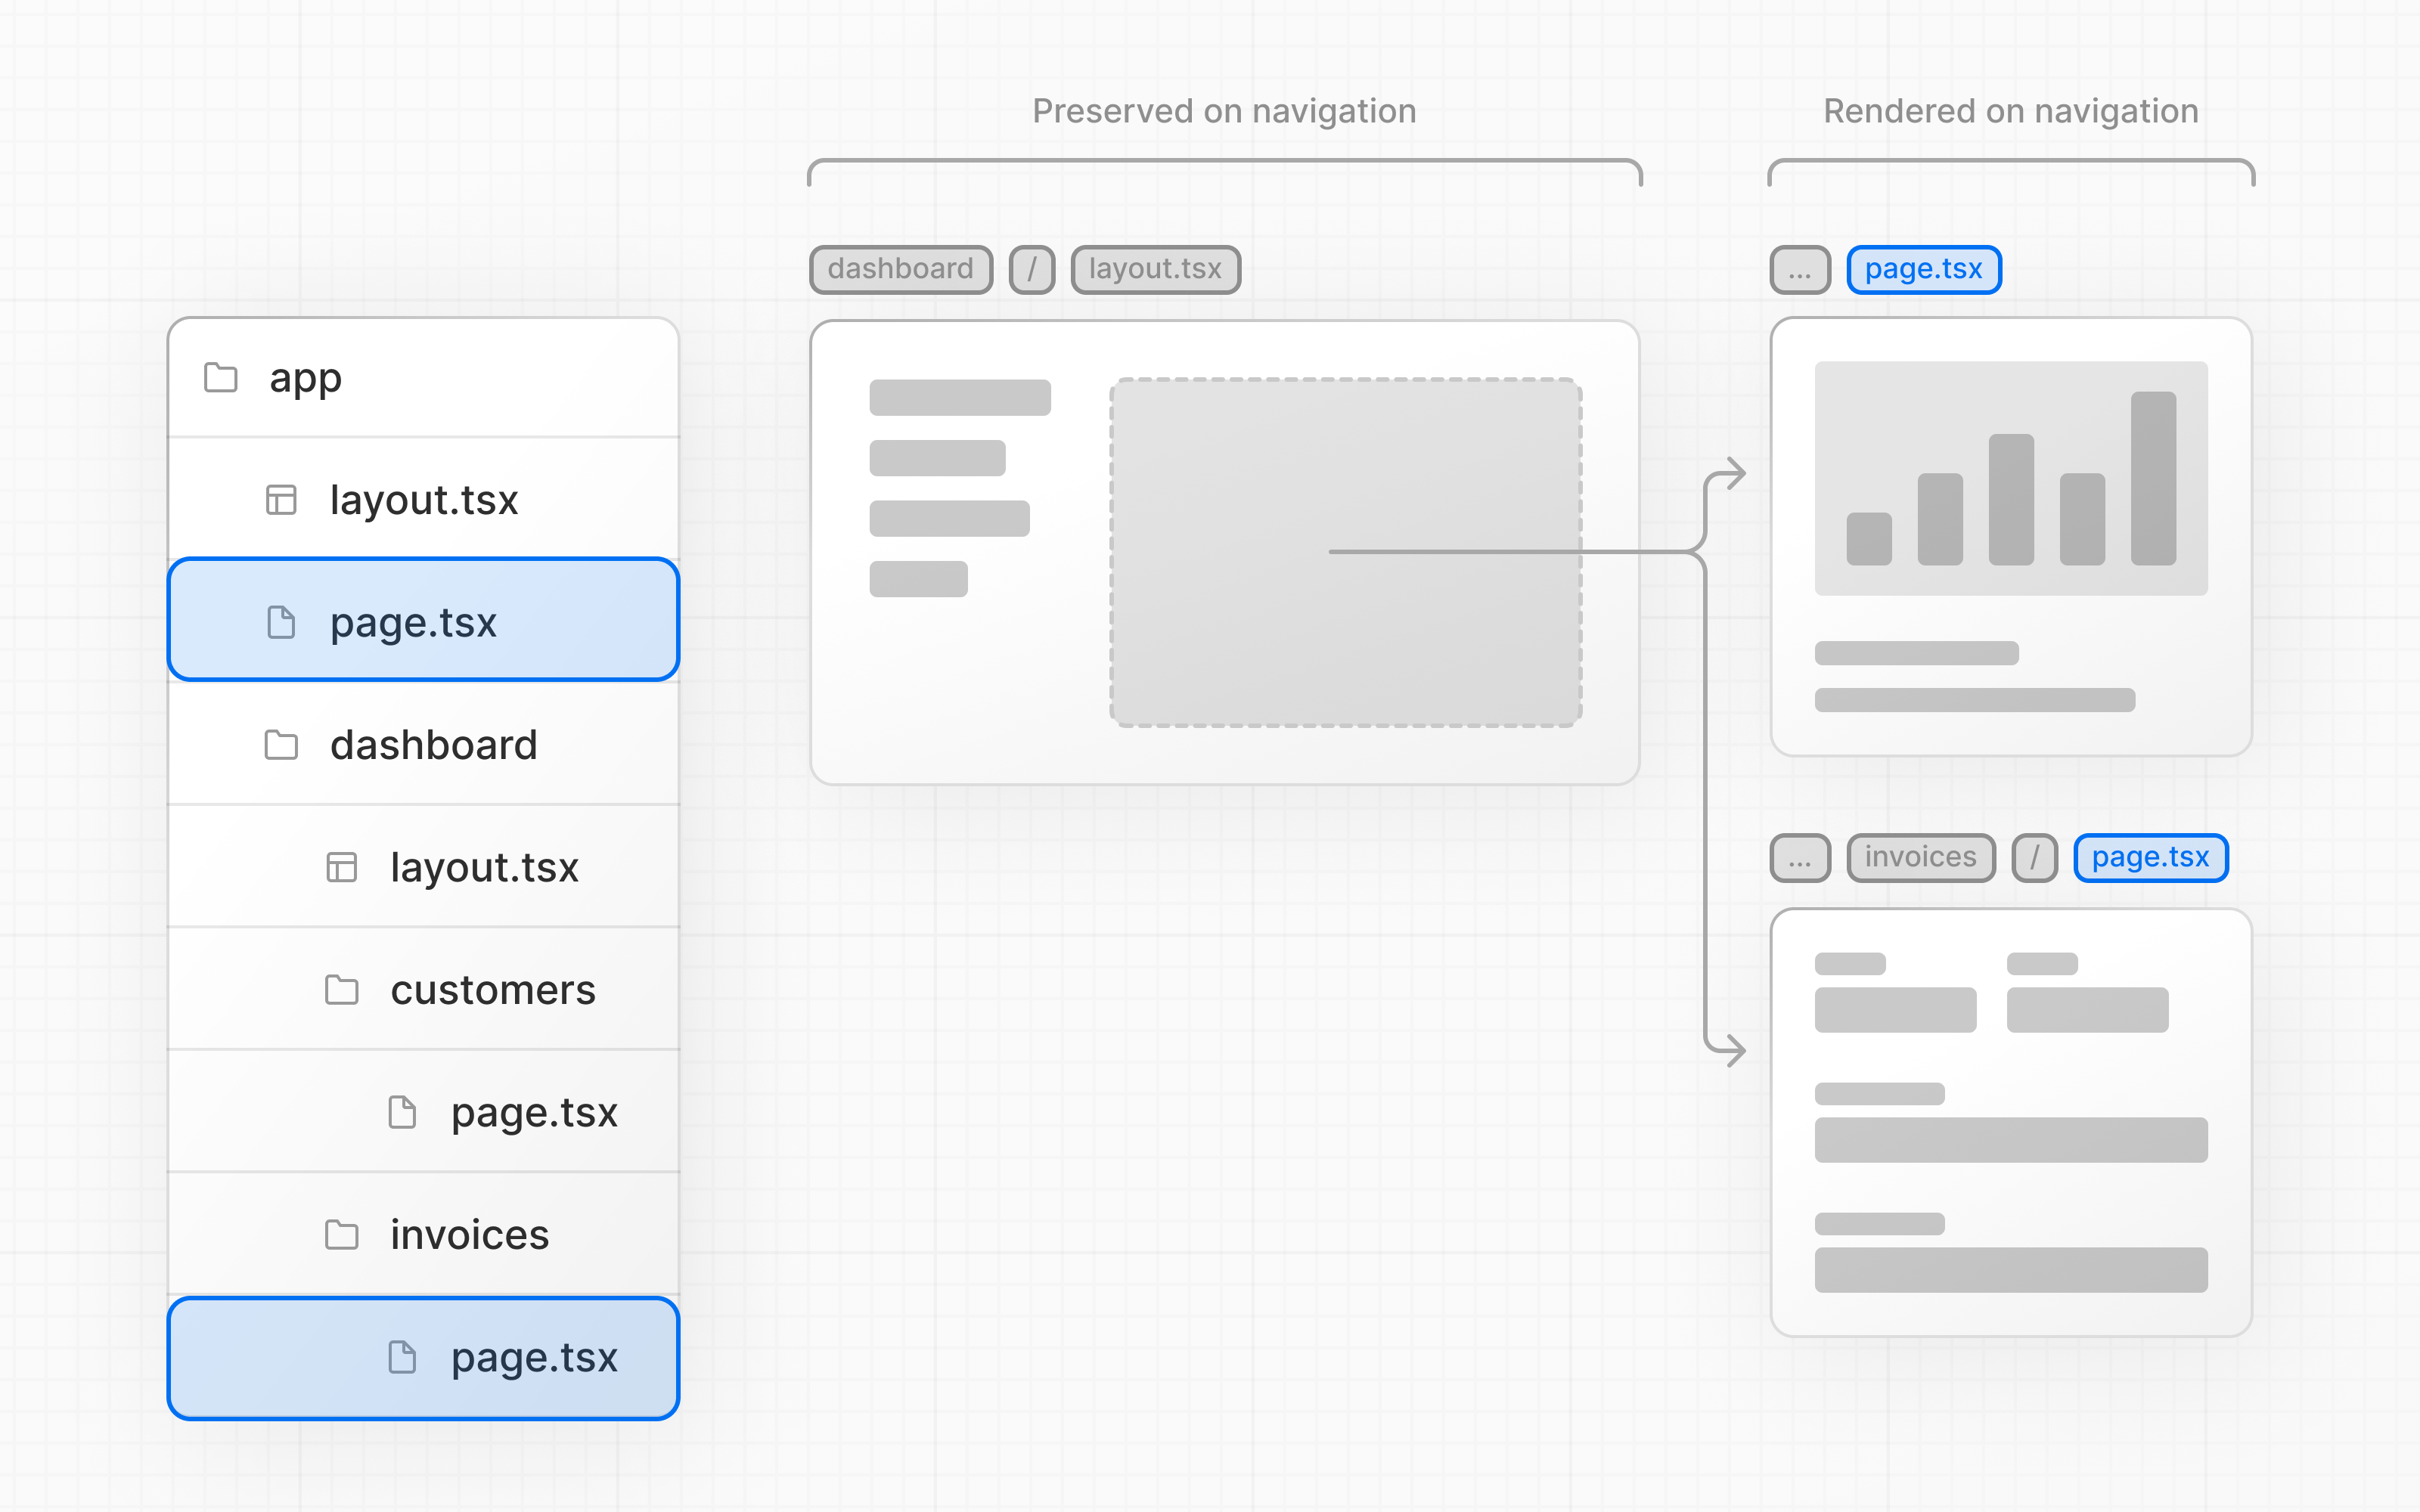
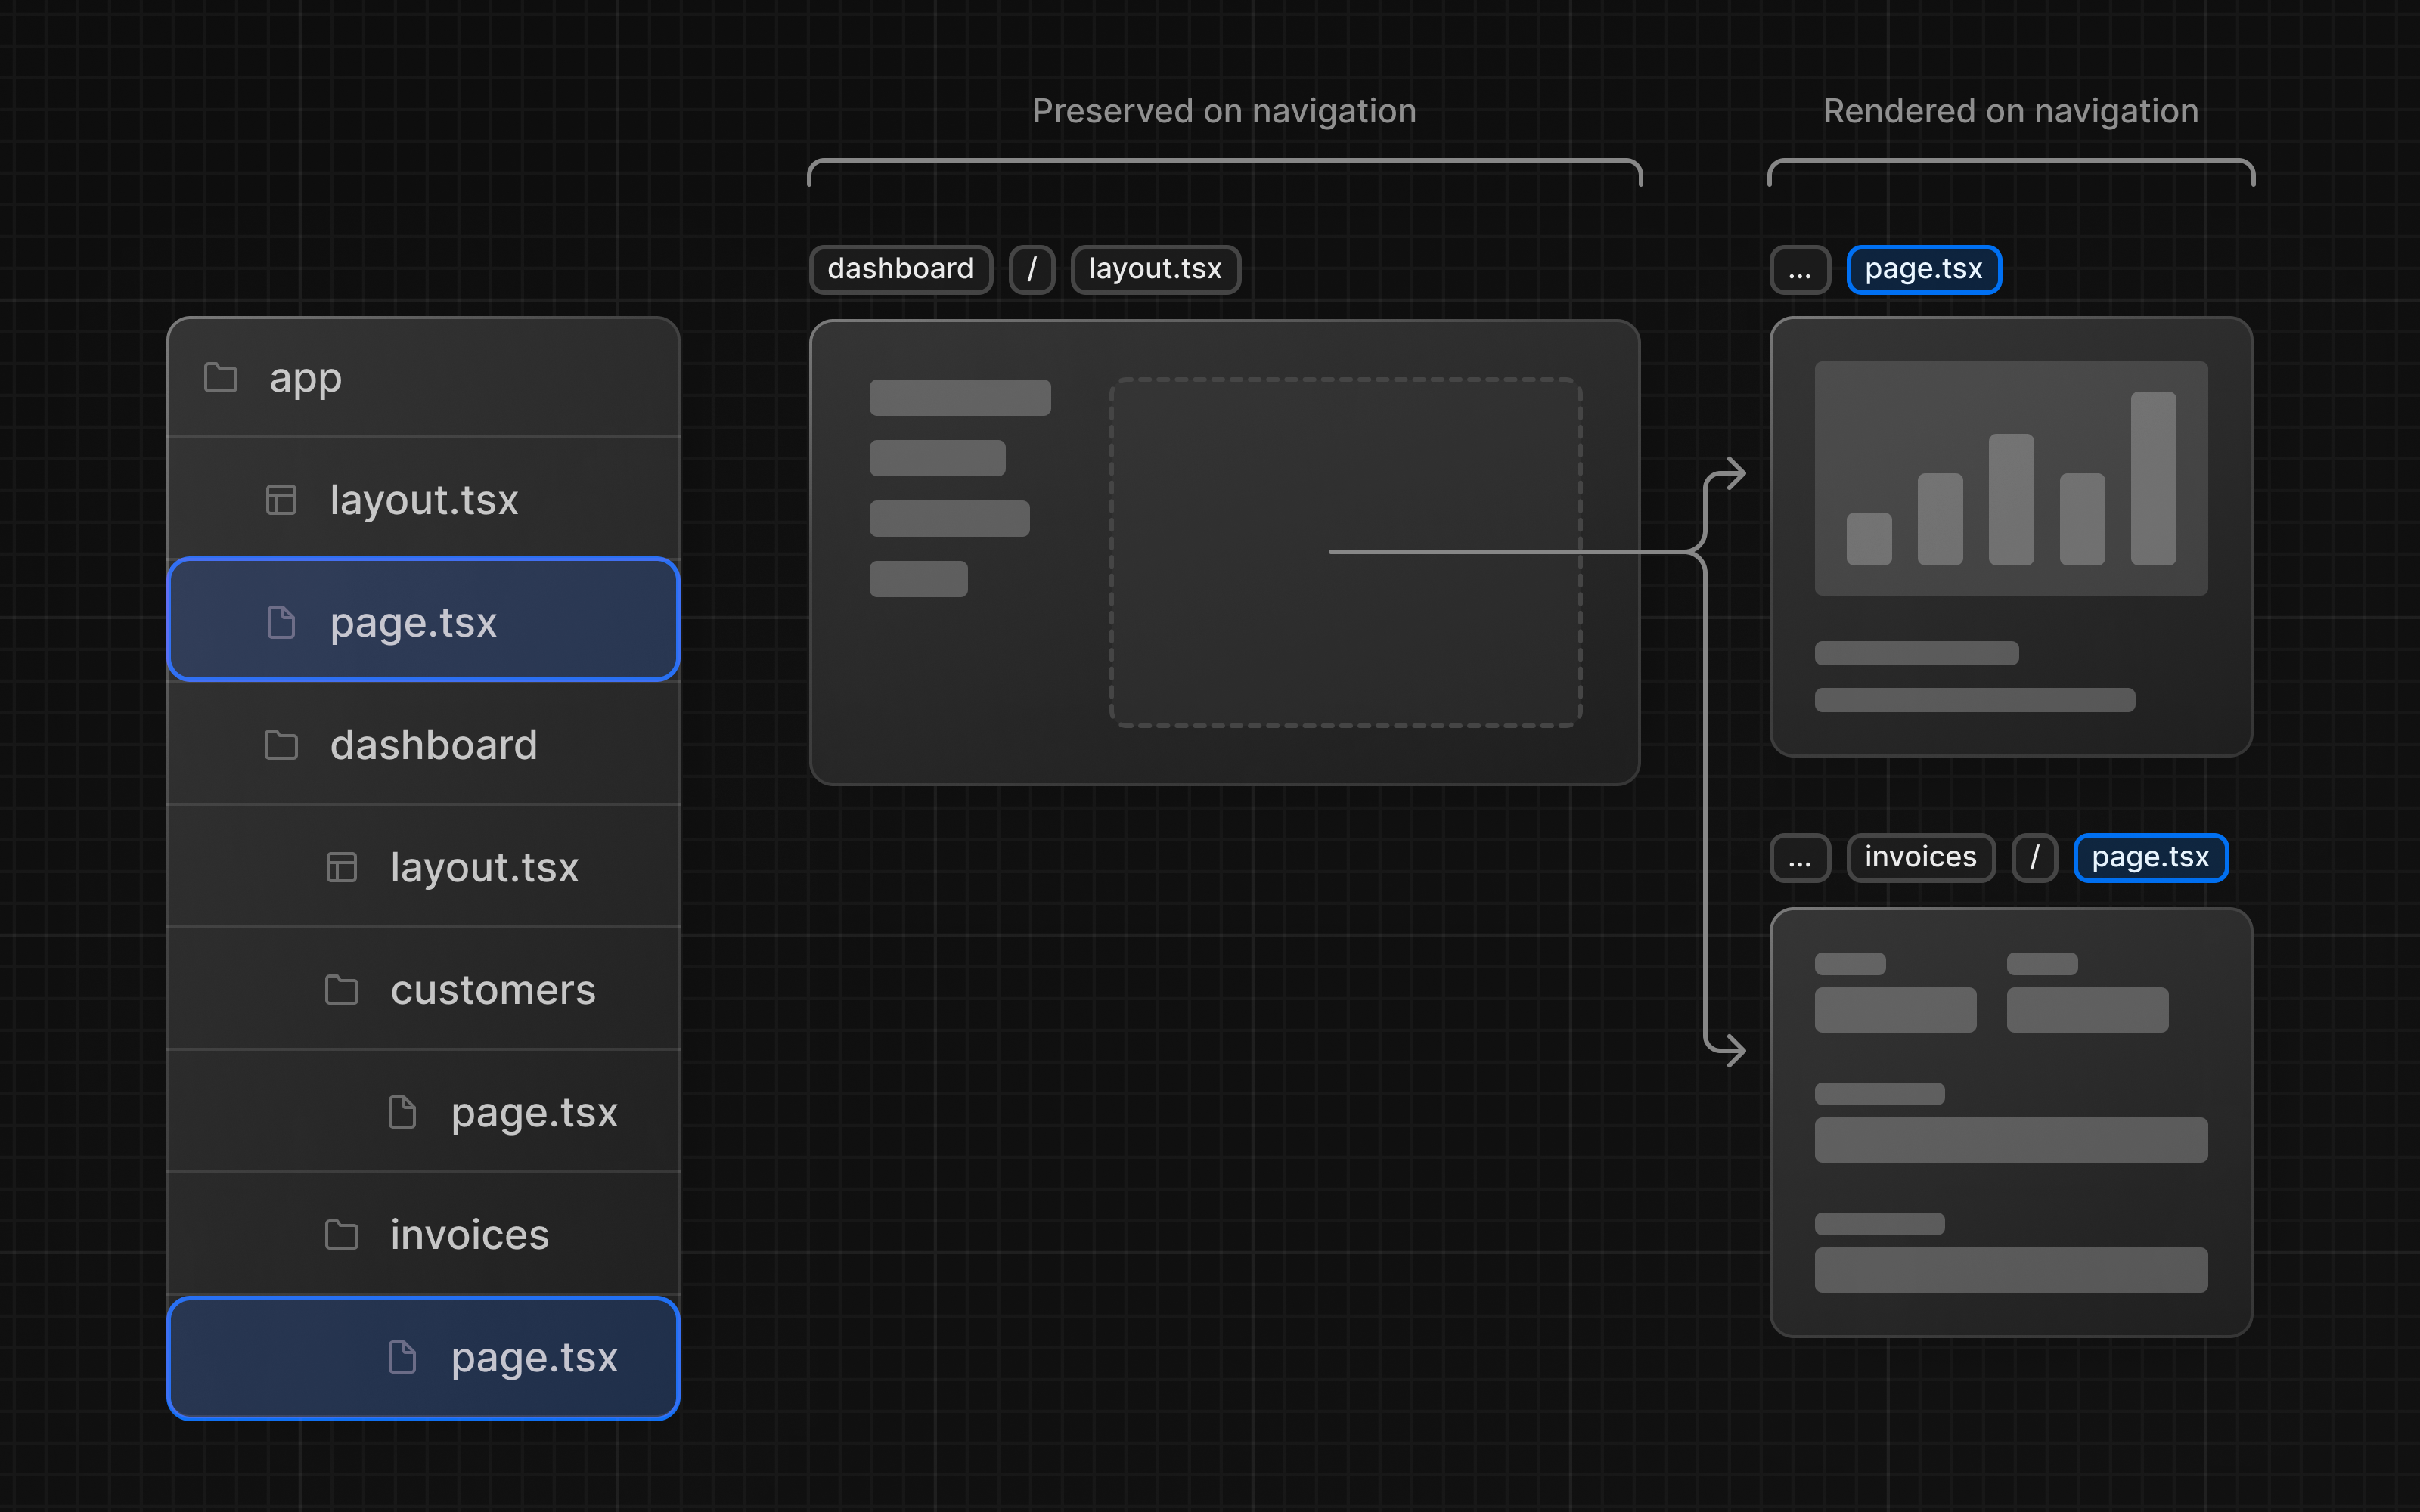
One benefit of using layouts in Next.js is that on navigation, only the page components update while the layout won't re-render. This is called partial rendering:
Root layout
In Chapter 3, you imported the Inter font into another layout: /app/layout.tsx. As a reminder:
import '@/app/ui/global.css';
import { inter } from '@/app/ui/fonts';

export default function RootLayout({
  children,
}: {
  children: React.ReactNode;
}) {
  return (
    <html lang="en">
      <body className={`${inter.className} antialiased`}>{children}</body>
    </html>
  );
}
This is called a root layout and is required. Any UI you add to the root layout will be shared across all pages in your application. You can use the root layout to modify your <html> and <body> tags, and add metadata (you'll learn more about metadata in a later chapter).
Since the new layout you've just created (/app/dashboard/layout.tsx) is unique to the dashboard pages, you don't need to add any UI to the root layout above.
You've Completed Chapter 4
Nice, the dashboard app is slowly starting to come together.
Was this helpful?